Orgozoa
Guida in italiano qua!
Cliccate su Leggi Tutto per la guida intergrale in inglese!
Orgozoa
Quick Tips
Phase One-
Move 10+ yards away from others if afflicted with
 Incubation Fluid when
  Arcing Current is cast.
 -
Dodge the
 Dribbling Ichor zones.
 -
Kill off Zoatroid adds as quickly as possible.
-
A tank with high
 Desensitizing Sting stacks needs to soak the
  Amniotic Splatter patches left behind by dead Zoatroid adds.
 -
Make sure that no tank reaches 10 stacks of Desensitizing Sting by having the add tank only reach 6 stacks and the other tank only reach 7.
-
Rush down to the next chamber and interrupt the
 Massive Incubator at the last second, or once everyone has arrived.
 -
Dodge the Unstable Eggs and
 Hatchery Moulting environment effects.
 -
Be careful not to touch jellyfish, as they one shot with their Electro Shock!
Repeat the phase one strategy with these additions:
-
Move away from allies when targeted by
 Aqua Lance.
 -
Interrupt the
 Conductive Pulse cast by the Azsh'ari Witch.
 -
Stand within the
 Powerful Stomp as to help split the damage to survivable levels.
Phase 1
Incubation Fluid
Around every 20-25 seconds, Orgozoa will apply -
This is a permanent debuff which simply deals moderate nature damage every second.
-
Simple as this seems, players with this debuff need to ensure that they are at least 10 yards away from their allies when the boss casts Arcing Current.
Arcing Current
At some point between each new -
This deals a moderate burst of nature damage to the target whilst attempting to chain this damage to up to three additional targets nearby.
-
Any player hit by this ability will have Incubation Fluid applied to them if they did not have the debuff already.
-
Any player with Incubation Fluid needs to keep a close eye on the boss timers as to ensure that the amount of Incubation Fluids applied to the raid via this ability is kept to a minimum.
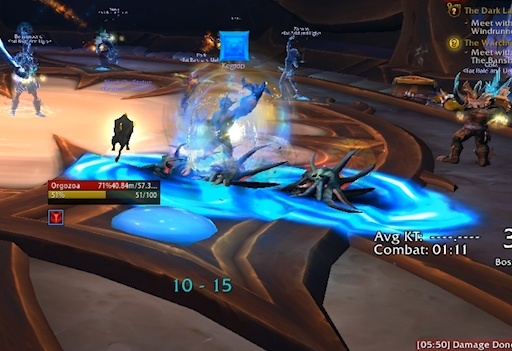
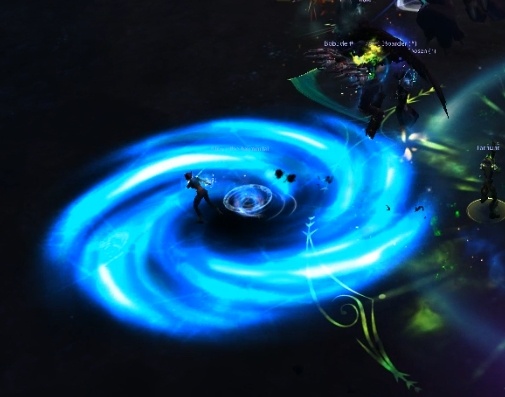
Dribbling Ichor
When the boss reaches full energy, it will channel -
This creates several patches that coat the encounter space, with a small spaces in between each of them.
-
These patches will deal high nature damage to anyone who stands within them.
-
3 sets of patches will appear over the abilities duration. The locations of the patches are set and the boss will alternate between them over the course of the ability.
-
Players need to stand within the safe spaces between the patches as to stay alive.
-
Once the ability has ended, players should then spread back out if afflicted with Incubation Fluid.

Zoatroids
Shortly after each-
These should be tanked at least 15+ yards away from the boss, as Orgozoa has the
 Chaotic Growth aura which increases damage done and reduces damage taken by 50% for all adds within 15 yards.
 -
2 Zoatroids spawn on the southern side of the encounter space, with the 3rd spawning in the north. The boss should be tanked in the north as to keep him away from the majority of the adds as they spawn.
-
The Zoatroids will occasionally instantly cast Pervasive Shock, dealing a moderate amount of nature damage to the entire raid. This simply needs to be healed up.
-
All DPS should switch to the Zoatroids when they spawn and kill them as soon as possible, as to minimise the amount of incoming raid damage.
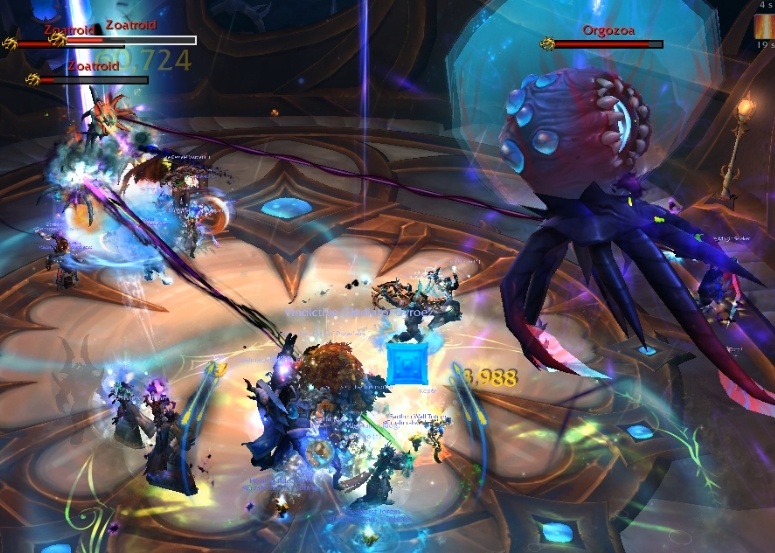
When a Zoatroid dies, it will mark the location it died with an ![]() Amniotic Splatter.
Amniotic Splatter.
-
This blue patch will explode after 5 seconds, dealing a lethal burst of nature damage to any players within it and a high amount of nature damage to the entire raid.
-
If no player stands within the blue patch when it explodes, the raid will be hit with
 Amniotic Eruption, dealing lethal damage and applying a heavy hitting 30 second dot to anyone that survived.
 -
Only certain immunities can soak this ability. As an example, Ice Block can be used to soak the patches, whereas Aspect of the Turtle and Cloak of Shadows can not.
-
To counter this, a tank with high stacks of Desensitizing Sting should stand in all three Amniotic Splatter patches.
Desensitizing Sting
Every ~6 seconds, the boss will apply -
This 45 second long debuff reduces the damage the target takes by 10% per stack.
-
Tanks must avoid gaining 10 stacks of this debuff, as otherwise they will be afflicted with
 Heart-Stopping Paralysis which instantly kills them.
 -
A tank with 5+ stacks of Desensitizing Sting can comfortably soak all three Amniotic Splatter patches, as long as they are kept topped up by the healers.
Tanks have to taunt off of one another at specific stack points as to ensure that a tank can easily soak all three ![]() Amniotic Splatter patches whilst having high stacks of
Amniotic Splatter patches whilst having high stacks of ![]() Desensitizing Sting.
Desensitizing Sting.
-
The tanks should be assigned a role each. One is the "add tank", the other is the "non add tank".
-
The "add tank" should start tanking the boss at the beginning of the fight.
-
When the adds spawn, the "non add tank" taunts and the "add tank" gains threat on all three adds. The "add tank" will have 6 stacks at this point.
-
After all three adds have died, the "add tank" should taunt the boss back as soon as his stacks drop. The "non add tank" will have 7 stacks at this point.
-
This lines up in such a way that the "add tank" will always have 6 stacks when soaking the patches.
-
TL:DR: Add tank taunts on 7 stacks. Non Add tank taunts on 6 stacks.
Intermission
Immediately upon entering the intermission, the boss will exit out of the western exit and quickly zoom down into the chamber below.-
This takes 34 seconds. Upon reaching the bottom, the boss will begin to cast Massive Incubator.
-
This will "awaken all denizens of the hatchery", which sounds terrifying and will likely lead to a wipe.
-
All players should get to the bosses room and the cast should be interrupted when all players have arrived, or at the last moment if some players are too slow.
-
Whilst casting Massive Incubator, the boss is taking 90% less damage, so it is kinda pointless to sit there and nuke the boss if all players have arrived on time.
-
Unstable eggs will trigger an Eggsploision if anyone runs into them, dealing damage and knocking the player back.
-
Hatchery Moulting swirly circles will knock back any player who stands within them when they detonate.
Avoid the multiple hazards along
the path to the next chamber!
Jellyfish floating in the space away from the path will one shot players with ![]() Electro Shock if they are touched.
Electro Shock if they are touched.
-
Players are able to jump from the upper section of the path to the lower section with a movement speed increase, but this will instantly kill you, so don't do it!
-
This can instantly kill players. It is unclear what exact spell is killing the players, as it not shown in combat logs.
-
To stay on the safe side, do not rely on this grip to get to the bosses room.
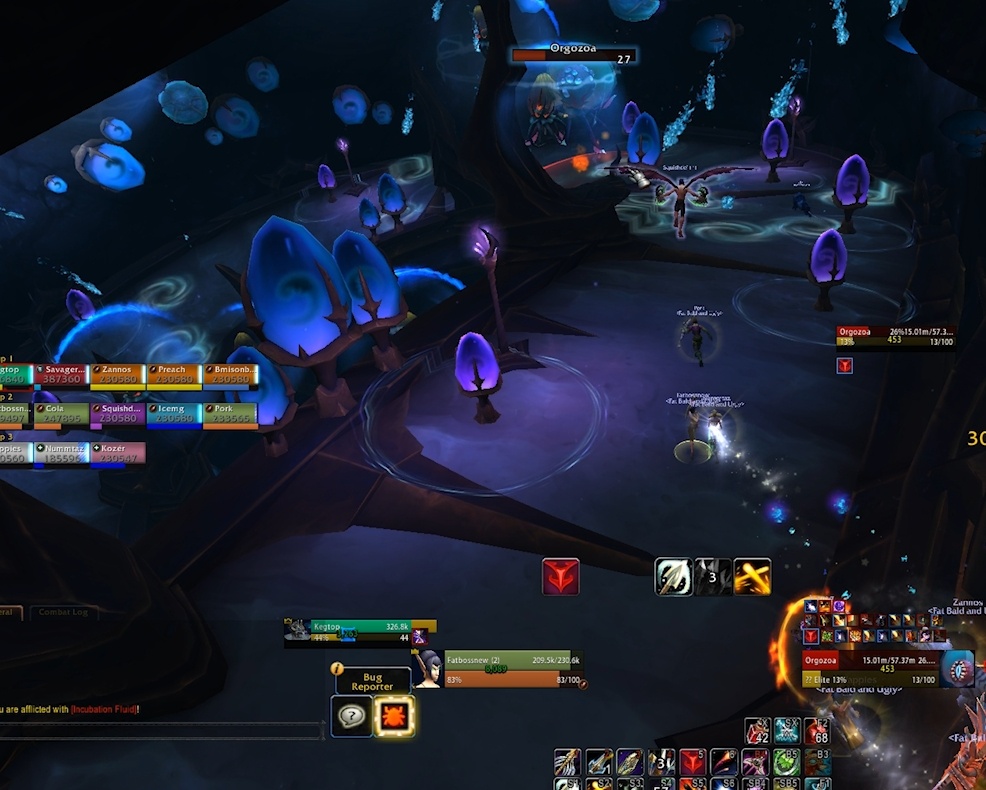
Phase Two
The boss will maintain access to itsThe boss will not spawn any Zoatroid on normal difficulty, instead the boss will summon 2 naga adds after each ![]() Dribbling Ichor.
Dribbling Ichor.
-
The adds the boss summons is randomly selected from a pool of three adds. The adds chosen will always be different from one another.
-
Listed below are the three different add types, their key abilities and the strategies needed to counter them.
-
Regardless of what adds spawn, they should be killed as soon as possible as to keep the number of incoming abilities to a minimum.
Zanj'ir Myrmidon
-
This add will target a random player with Aqua Lance. After 4 seconds, the add spawns a
 Raging Rapids patch at that players location.
 -
If you are targeted by this, you should move to a low traffic area so that the Raging Rapids patch is out of the raids way.
Azsh'ari Witch
-
Aside from dealing random bursts of damage to players with her
 Shocking Lightning, this add casts Conductive Pulse.
 -
If this 3 second interruptible cast goes through, it will stun the entire raid for 3 seconds.
-
It is vital the cast is interrupted, and because of this dangerous cast: the Azsh'ari Witch should always be focused down as the highest priority.
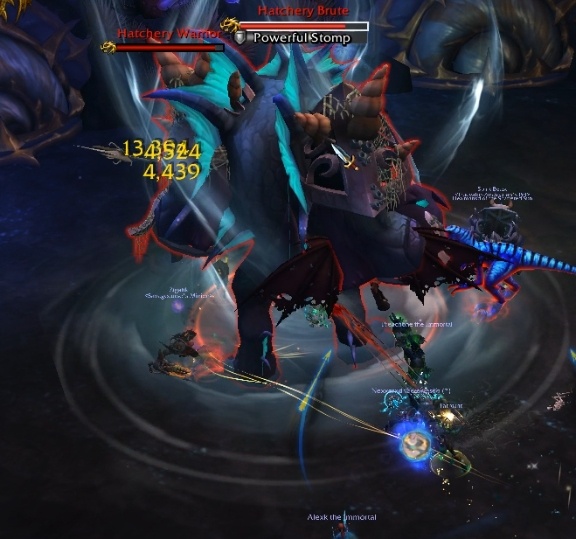
Dreadcoil Hulk
-
This add will occasionally cast Powerful Stomp which deals a lethal burst of physical damage split between all players within 14 yards of the add.
-
The "add tank" should be able to survive this hit by themselves, as they should have high stacks of Desensitising Sting.
-
Alternatively, all available players can stand next to this add as to help split the incoming damage.
-
Any melee on this add need to be aware of the number of players around them, as they may need to move out of the ability if very few players are going to be hit.
-
It is vital that at least one person is hit by the Powerful Stomp, as otherwise a
 Reverberating Tremor will trigger, dealing substantial raid wide damage.
Aside from the addition of the new adds, phase two plays out very similarly to phase one, with tanks taunting off of each other at the 6 & 7 stack mark whilst players nuke the adds over the boss.
Heroic Difficulty
Zoatroid
During phase two, Zoatroid adds will continue to spawn.-
Dealing with these adds is done in the same way as phase one: make sure the tank picks them up and soaks the Amniotic Splatter when they die.
-
As there will be additional adds, DPS need to dedicate significantly more time to them than they did on normal difficulty.