Sun King's Salvation
Guida in italiano qua!
Cliccate su Leggi Tutto per la guida completa in inglese!
Sun King's Salvation Quick Tips in Castle Nathria
Phase One General Strategy
-
Heal Kael'thas Sunstrider as much as possible, whilst keeping mana efficiency in mind!
-
Players can use Soul Pedestals to sacrifice their own health to give to Kael'thas Sunstrider!
Phase One Adds
-
Rockbound Vanquisher - Kill them before their
 Concussive Smash is cast too many times and taunt off of each other when your
  Vanquished stacks drop.
 -
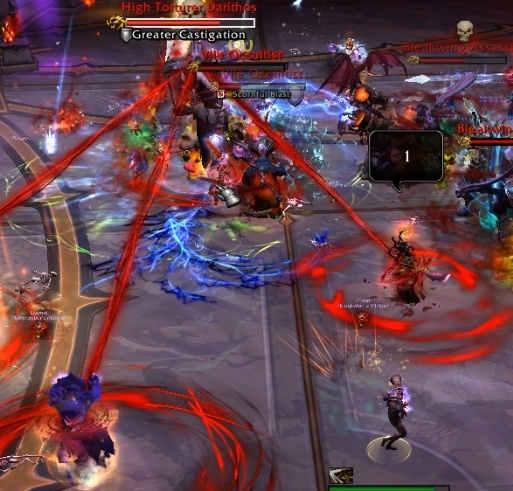
Bleakwing Assassin - Spread 8+ yards when marked with the
 Crimson Flurry and burst them down before they finish casting
  Return to Stone.
 -
Vile Occultist - Interrupt their
 Vulgar Brand or dispel the debuff it applies. Heal the Essence Font they drop for a burst of healing on Kael'thas Sunstrider.
 -
Pestering Fiend - Cannon fodder. Casually cleave them down, but don't be near them on Heroic when they die as they explode with
 Fragmentation!
 -
Soul Infuser - Crowd control and kill them before they reach Kael'thas Sunstrider and cast
 Soul Infusion. One healer should collect the Infuser's Orb for a big
  Infuser's Boon buff!
Phase Two
-
Occur at 40% & 90% of Kael'thas Sunstrider remaining health.
-
Kael'thas Sunstrider cannot be healed by players during this phase.
-
Bring the Shade of Kael'thas mini-boss to the side of the room, away from his Reborn Phoenix adds.
-
Ranged DPS should crowd control and kill the Reborn Phoenix adds. If they respawn, kill them again!
-
The raid should stack behind the boss which is being faced away from them.
-
Tanks should taunt off of each other when their
 Burning Remnants stacks expire (applied via
  Fiery Strike).
 -
A group of players should soak the target marked for
 Ember Blast to help spread the damage of the ability.
 -
The player marked by Ember Blast should move 10 yards away from the raid into a low traffic area, as they will spawn a patch of fire underneath themselves when the spell ends.
-
Bring the Shade of Kael'thas to 50% health to end the phase. Kill him the second time round to end the fight.
Sun King's Salvation Phase One Abilities & Strategy
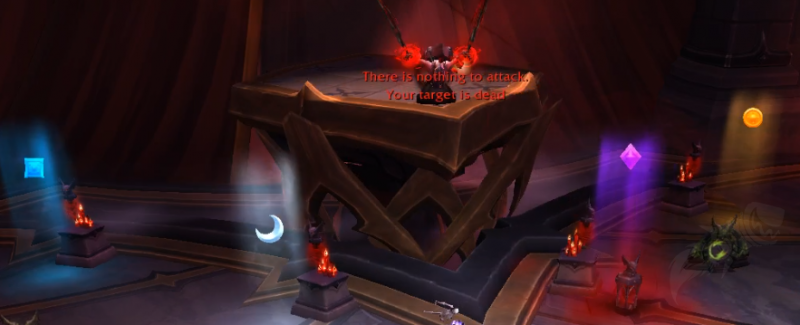
Kael'thas Sunstrider
Kael'thas Sunstrider is a friendly NPC that can be found on an elevated platform on the far end of the room. He begins the encounter with 10% health and the raid needs to heal him to full to defeat this encounter.
-
Kael'thas Sunstrider does not have any abilities on normal or heroic difficulty and he will simply stay passive throughout the encounter.
-
He cannot be reached by ground "AoE" healing effects, such as spirit link totem or healing rain, unless they are placed on his platform.
-
Heals placed on his platform cannot be reached by players: meaning you can't cheese this entire fight with a Spirit Link Totem... sorry!
-
Healers can very easily run into mana issues if they constantly use inefficient spells. Each healer should look to use their mana carefully throughout the fight as to not run into mana problems later down the road.
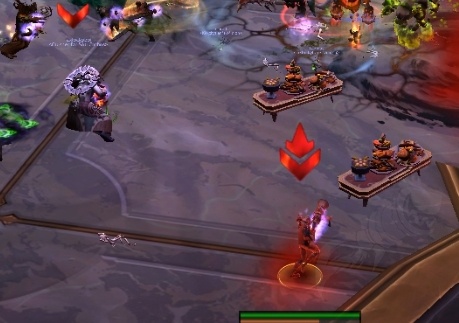
Four interactable Soul Pedestals are located near Kael'thas Sunstrider, two on either side of him.
-
When a player interacts with a Soul Pedestal, they will begin to channel Soul Infusion over 15 seconds, dealing every increasing percent health damage to the player every 3 seconds via
 Drained Soul debuff applications.
 -
The damage done by the pedestals is transferred into direct healing to Kael'thas Sunstrider, allowing players who do not have healing abilities to contribute some health towards the boss.
-
Drained Soul prevents the player from reusing a Soul Pedestal for 2 minutes. So any player who uses the pedestals should do so for the full 15 second duration unless they are in danger of dying or the group is in danger of falling behind on add control.
-
If a player interacts with a pedestal that is currently in use by another player, they will interrupt the currently-channelling player and start channelling themselves. We do not recommend you do this.
-
Healers need to keep an eye on players channelling Soul Infusion, as it deals incredibly high damage to the player towards the end of the channel.
-
Players should look to use these pedestals during downtime when few or no adds are present.
Beta Test Note: The ![]() Soul Infusion did not seem to be healing the boss for the amount of damage taken by the players, making use of the Soul Pedestals entirely useless during the most recent testing. We believe this will be adjusted for when this boss reaches live servers.
Soul Infusion did not seem to be healing the boss for the amount of damage taken by the players, making use of the Soul Pedestals entirely useless during the most recent testing. We believe this will be adjusted for when this boss reaches live servers.
Soul Pedestal
Four interactable Soul Pedestals are located near Kael'thas Sunstrider, two on either side of him.
-
When a player interacts with a Soul Pedestal, they will begin to channel Soul Infusion over 15 seconds, dealing every increasing percent health damage to the player every 3 seconds via Drained Soul debuff applications.
-
The damage done by the pedestals is transferred into direct healing to Kael'thas Sunstrider, allowing players who do not have healing abilities to contribute some health towards the boss.
-
Drained Soul prevents the player from reusing a Soul Pedestal for 2 minutes. So any player who uses the pedestals should do so for the full 15 second duration unless they are in danger of dying or the group is in danger of falling behind on add control.
-
If a player interacts with a pedestal that is currently in use by another player, they will interrupt the currently-channelling player and start channelling themselves. We do not recommend you do this.
-
Healers need to keep an eye on players channelling Soul Infusion, as it deals incredibly high damage to the player towards the end of the channel.
-
Players should look to use these pedestals during downtime when few or no adds are present.
Beta Test Note: The ![]() Soul Infusion did not seem to be healing the boss for the amount of damage taken by the players, making use of the Soul Pedestals entirely useless during the most recent testing. We believe this will be adjusted for when this boss reaches live servers.
Soul Infusion did not seem to be healing the boss for the amount of damage taken by the players, making use of the Soul Pedestals entirely useless during the most recent testing. We believe this will be adjusted for when this boss reaches live servers.
Ministers of Vice
Throughout phase one, waves of adds will flood the encounter space. These adds need to be understood, controlled and killed for the raid to successfully defeat this encounter.
-
There are 6 different types of adds. Groups of the same add usually spawn in by themselves and occasionally overlap with other add spawns.
-
All adds should be grouped up together as much as possible, as to allow the DPS to cleave them down quickly and easily.
-
Adds frequently spawn on opposite sides of the room at the same time. Tanks should each assign themselves a side of the room to go to pick adds up. Misdirect spells should be used to assist in this task.
-
Healers should generally position themselves towards the middle of the room and towards Kael'thas Sunstrider, as this will help funnel adds towards them which will help the tanks pick them up more easily.
-
Below you can find a quick overview on what each add does, where they spawn, and how to deal with them.
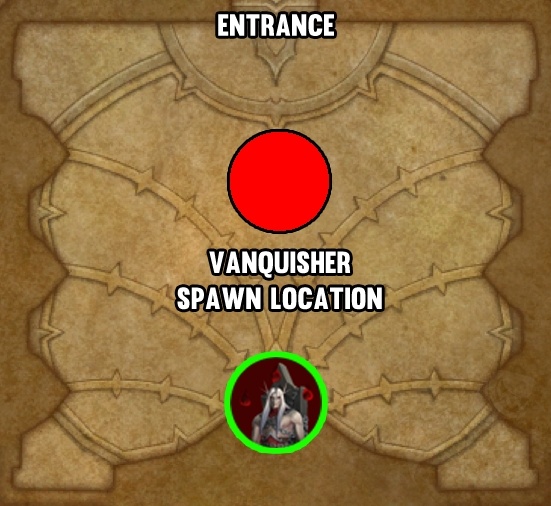
Rockbound Vanquisher
This large add will usually spawn by itself by flying down into the centre of the room.
![]() Concussive Smash deals moderate physical damage to all players and grants a stack of
Concussive Smash deals moderate physical damage to all players and grants a stack of ![]() Reverberation to the vanquisher, increasing damage dealt by
Reverberation to the vanquisher, increasing damage dealt by ![]() Concussive Smash by 25% and this stacks.
Concussive Smash by 25% and this stacks.
-
Healers will need to ensure that the raid is healthy whilst this add is active and the DPS should aim to kill it before it can cast this ability too many times.
![]() Vanquishing Strike deals a burst of physical damage to the tank and applies a stack of
Vanquishing Strike deals a burst of physical damage to the tank and applies a stack of ![]() Vanquished: a bleed which lasts 20 seconds and can stack.
Vanquished: a bleed which lasts 20 seconds and can stack.
-
Tanks should look to taunt off of each other if needed, ideally around the 3 stack mark.
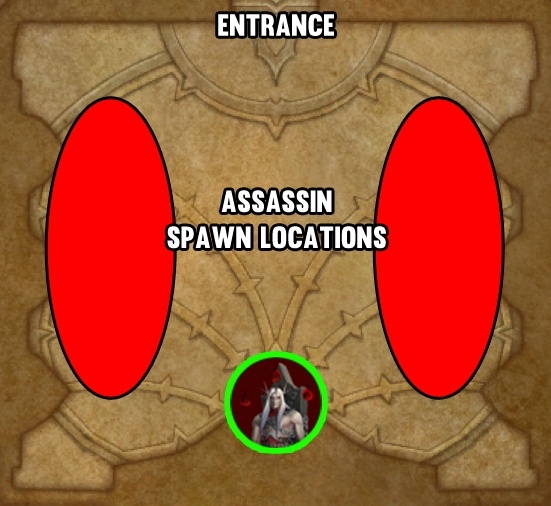
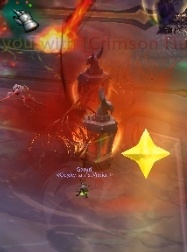
Bleakwing Assassin
These adds will spawn in groups of 4-6 by flying around to the edges of the room.
![]() Crimson Flurry marks several players. Moments later the assassin will teleport to each of these players dealing damage and applying a nasty bleed debuff to all players within 8 yards of the marked target.
Crimson Flurry marks several players. Moments later the assassin will teleport to each of these players dealing damage and applying a nasty bleed debuff to all players within 8 yards of the marked target.
-
Players marked by this ability must spread 8+ yards away from their allies, as splashing the damage from this ability can quickly lead to a wipe. As this is a bleed, bleed removal spells can be used to counter it.
-
As a small point of interest: you can actually dodge the damage of this ability if you are marked by using a teleport/high movement speed spell just as the add reaches you. However, this is probably not worth doing as you risk baiting it onto other players.
The Bleakwing Assassins will cast ![]() Return to Stone when they reach ~30% health. This 8 second cast causes the add to stand completely still and will restore them to full health upon completion.
Return to Stone when they reach ~30% health. This 8 second cast causes the add to stand completely still and will restore them to full health upon completion.
-
DPS should focus on killing any assassin casting Return to Stone to prevent this healing.
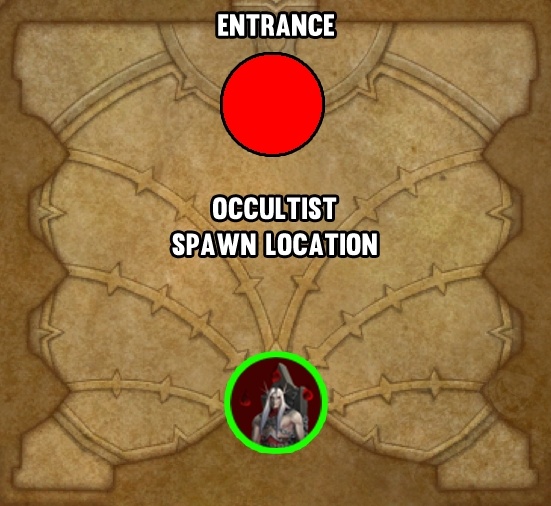
Vile Occultist
These adds spawn in groups of 3-5 by appearing at the entrance of the encounter space. They are also present at the beginning of the fight, with two being found on either side of the room.
![]() Vulgar Brand is an interruptible spell cast occasionally by these adds. If successful, this spell deals a small burst of shadow damage and applies a 35% damage taken debuff to a random player for 15 seconds. This debuff can be dispelled as a magic effect.
Vulgar Brand is an interruptible spell cast occasionally by these adds. If successful, this spell deals a small burst of shadow damage and applies a 35% damage taken debuff to a random player for 15 seconds. This debuff can be dispelled as a magic effect.
-
Players should look to interrupt these casts as a high priority, either via interrupts or crowd control spells. Any successful casts should be dispelled by your healers as a high priority.
Beta Note: This spell text implies that the cast targets "all enemies", meaning that the entire raid should get hit by it. This wasn't the case in most recent testing, as it only hit one player. ![]() Scornful Blast deals moderate shadow damage to a random player after a 1.5 second long interruptible cast.
Scornful Blast deals moderate shadow damage to a random player after a 1.5 second long interruptible cast.
-
Players should aim to kick these casts as a low priority, mainly just to spell-lock them which will force the add to move towards the tank.
![]() Door of Shadows is an uninterruptible spell cast occasionally that will teleport the Vile Occultist to a random nearby location.
Door of Shadows is an uninterruptible spell cast occasionally that will teleport the Vile Occultist to a random nearby location.
-
This is more irritating than dangerous, as it makes it awkward to stack them up for AoE/cleave damage. This spell can be interrupted via crowd control, which we recommend you do.
Upon death, the Vile Occultist will spawn an Essence Font at their location. This is a friendly NPC that will slowly lose health over time as it lays on the floor.
-
If the Essence Font dies, nothing happens. If it is healed to full, it will despawn and heal Kael'thas Sunstrider for 1% of his maximum health.
-
As the Essence Fonts have very low overall health, it is very efficient to focus healing them instead of Kael'thas Sunstrider, as the healing required to heal them to full is far less than the healing required to restore 1% health to Kael'thas Sunstrider.
-
Essence Fonts will appear in the Boss Frame UI element, allowing healers to easily target and heal them.
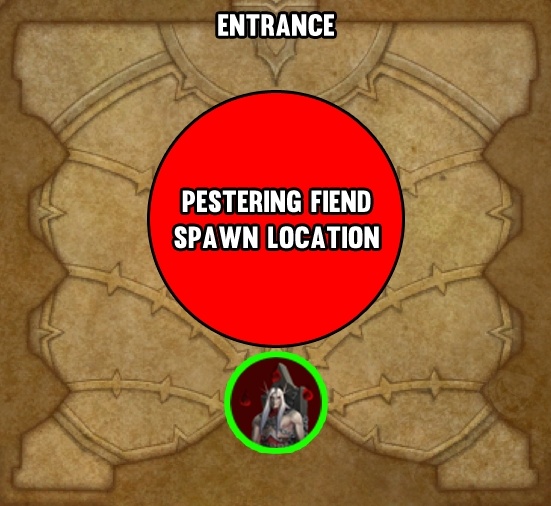
Pestering Fiend
These adds spawn in large groups of ~8 by appearing around the middle of the room in a spread-out fashion and will cast ![]() Shattering Ruby at random players, dealing low physical damage to that player and anyone within 3 yards.
Shattering Ruby at random players, dealing low physical damage to that player and anyone within 3 yards.
-
This spell can be interrupted, but doing so does not spell-lock the add, meaning it will just start casting it again.
-
Players should loosely spread from one another whilst Pestering Fiends are active to mitigate this splash damage.
-
The adds will not cast this spell immediately upon spawning, giving players a small window of time to group them together.
-
Displacement spells should be used on these adds as to group them together quickly and easily.
Soul Infuser
These adds spawn in two small groups on either side of the entrance gate. These groups can contain ~1-3 adds each. These adds do not need to be tanked. as the infusers will ignore all players and rush over to the Soul Pedestals next to Kael'thas Sunstrider. Upon reaching their destination they will channel ![]() Soul Infusion.
Soul Infusion.
-
Each channel deals 1% of Kael'thas Sunstrider' maximum health every 2 seconds. If the Shade of Kael'thas is active instead, the spell will heal the shade for 1% of its maximum health every 2 seconds.
-
This will quickly lead to a wipe if not prevented. Players must immediately crowd control and kill these adds as to stop them from reaching the pedestals.
-
If an add starts casting Soul Infusion, it can be interrupted via crowd control, but this will only stop them for as long as the crowd control is active.
-
As the adds spawn on either side of the doorway, we recommend that you hard crowd control one side whilst all DPS focus down the other. Once one side is defeated, all DPS switch to the side with the remaining infusers.
-
Alternatively, the raid can split its DPS into two teams and take down both sets of Soul Infusers simultaneously. If you choose this strategy, try and balance the amount of crowd control available to both groups.

Upon death, the Soul Infuser drops an Infuser's Orb which is an interactable object.
-
Clicking on the orb will grant the player the Infuser's Boon debuff which increases healing done by 50% for 14 seconds. This effect stacks and it's duration refreshes upon receiving a new stack.
-
Once an orb has been interacted with it will despawn, only allowing a single player to use an orb.
-
How this is best handled is not yet known, but we recommend that a single healer collects all of the orbs in a staggered fashion as to extend the duration of the effect for as long as possible.
-
This will grant that player an incredible amount of extra healing which can be used to quickly pump healing in Kael'thas Sunstrider or top the raid with a healing cooldown after high raid damage.
High Torturer Darithos
This add is present at the beginning of the encounter and will never respawn. It needs to be tanked and will occasionally channel ![]() Greater Castigation, dealing moderate shadow damage to random selected players and anyone within 6 yards every 0.5 seconds over 6 seconds.
Greater Castigation, dealing moderate shadow damage to random selected players and anyone within 6 yards every 0.5 seconds over 6 seconds.
-
The marked players should simply move away from their allies as to not splash damage onto them.
-
This add should be killed as a low priority, as its overall damage and disruption to the raid is relatively small in comparison to other adds active at the beginning of the fight.
Sun King's Salvation Phase Two Abilities and Strategy
Shade of Kael'thas
Upon reaching 40% and 90% health, Kael'thas Sunstrider manifests a Shade of Kael'thas add in the middle of the encounter space.
-
This mini-boss will spawn with 60% health the first time and 10% health the second time.
-
Whilst this mini-boss is active, Kael'thas Sunstrider is immune to all healing done from players. However, damage taken by this add heals Kael'thas Sunstrider during this phase.
-
After dealing damage equal to 10% of this adds health, it will despawn and either phase one will begin again or the fight will be completed.
It is currently unclear as to whether or not the Minister of Vice adds will spawn in this phase.
-
We do know that the adds are not removed automatically, so any leftover adds should be killed as soon as possible so that players can focus on the mini-bosses abilities in isolation.
-
If adds do spawn during this phase, then the group should keep them under control as much as possible, but should look to push the mini-boss down to 50% or 0% health as to get out of the phase as soon as possible.
Fiery Strike
The Shade of Kael'thas will frequently cast ![]() Fiery Strike, dealing moderate fire damage and applying Burning Remnant debuffs to all players within a 12 yard cone directed at the tank.
Fiery Strike, dealing moderate fire damage and applying Burning Remnant debuffs to all players within a 12 yard cone directed at the tank.
-
Burning Remnants deals low fire damage every second over 15 seconds and this effect stacks.
-
Tanks should always face Kael'thas Sunstrider away from the raid which should be stacked loosely behind him. The tanks should then take turns tanking this mini-boss, taunting off of each other at around 3 stacks.
 Blazing Surge
The Shade of Kael'thas gains energy over time. At 100 energy he casts ![]() Blazing Surge, which deals a moderate burst of fire damage to all players within a large 40 yard frontal cone directed at the tank.
Blazing Surge, which deals a moderate burst of fire damage to all players within a large 40 yard frontal cone directed at the tank.
-
This ability will not track the player it is cast on, allowing players to sidestep the ability.
-
As this is focused on the tanks on normal mode, facing the boss away and sidestepping the ability is a simple way of countering the mechanic.
-
Do note that this is directed at a random player on heroic difficulty and above, meaning that all players should keep an eye on the boss as to allow them to dodge the ability on those difficulties.
Beta Test Note: This mechanic is listed as spawning Smoldering Remnant patches when it is cast. This was not present as of most recent raid testing. If it is present on live, bait the cast towards a wall to keep the room clean.
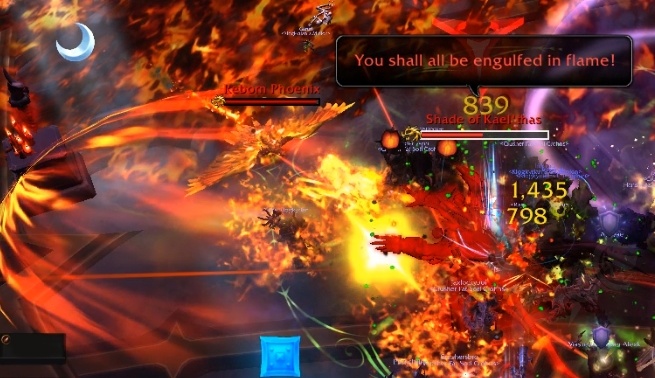
Reborn Phoenix
Two Reborn Phoenix adds will spawn on either side of the mini-boss as he appears in the arena.
-
These adds will fixate random players and move towards them. If they reach a player they simply melee hit for a small amount of physical damage.
-
Every 2.5 seconds, the Phoenix adds will deal damage to all players within 6 yards via
 Smoldering Plumage. This also leaves behind a
  Smoldering Remnants patch, a pool of fire which deals high ticking damage to players who stand in it.
As these adds always spawn in the middle of the encounter space, we recommend that the boss is dragged to a nearby wall, away from the adds.
-
This gives distance for the raid to stand out of the range of Smoldering Plumage.
-
All ranged DPS should then focus down the adds whilst using crowd control spells, such as slows and stuns, to keep them in position.
-
Once an add dies, it will slowly regenerate health over time. During this time the add cannot be damaged. Upon reaching full health it will reactivate and start chasing players again.
-
These adds will only despawn when the Shade of Kael'thas despawns upon reaching 50% or 0% health.
-
As this phase doesn't last too long, the raid should only need to kill the Reborn Phoenix adds a single time. However, if the phase is lasting a long time then the adds should be re-killed as to keep them room clear of fire patches.
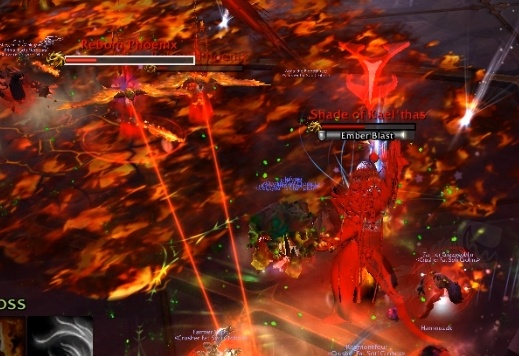
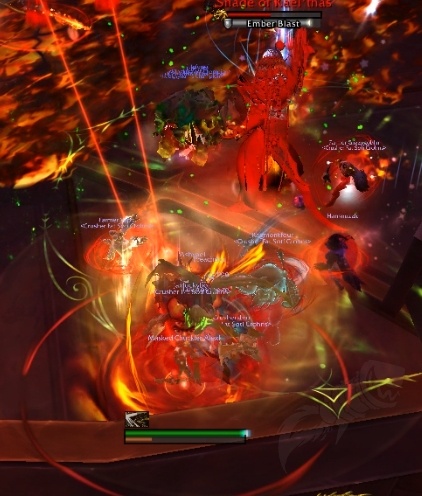
Ember Blast
A random non-tank player is occasionally marked with ![]() Ember Blast. After 5 seconds, that player will take lethal fire damage and receive 6 stacks of
Ember Blast. After 5 seconds, that player will take lethal fire damage and receive 6 stacks of ![]() Lingering Embers.
Lingering Embers.
-
Both the damage and debuff applications are split between all players within 6 yards.
-
Multiple players should stand on the marked player as to bring the damage down to survivable levels.
-
This ability also spawns a patch of Smoldering Remnants. Because of this, the ability should be soaked ~10 yards away from the raid as to ensure the fire spawns in low traffic areas.
Once the Shade of Kael'thas reaches 50% he will despawn and Kael'thas Sunstrider will be healable via player spells and Soul Pedestals once more.
-
The Smoldering Remnants pools will continue to persist during phase one, but will despawn over time (approximately 1 minute).
-
Upon fighting the shade for the second time and bringing him to 0% health, he will despawn and the fight will be complete.
Heroic Sun King Salvation in Castle Nathria
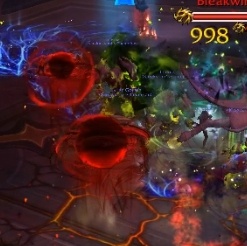
Fragmentation
Pestering Fiend adds will explode on death via ![]() Fragmentation, dealing a moderate burst of physical damage to all players within 7 yards.
Fragmentation, dealing a moderate burst of physical damage to all players within 7 yards.
-
This damage is triggered immediately after the add dies, giving players within melee range no time to move from it.
-
Because of this, melee players should move away from the Pestering Fiend adds whenever they are about to die, as to avoid the damage from Fragmentation.
Blazing Surge
![]() Blazing Surge targets a random players location, rather than the primary targets location.
Blazing Surge targets a random players location, rather than the primary targets location.
-
As a result, all players must pay attention to what direction the Shade of Kael'thas is facing as to sidestep out of the cone.
-
Players should also make sure that they are close to the boss, as they may not have time to move out if they are too far away.
Mythic Sun King Salvation in Castle Nathria
 Cloak of Flames
During phase one, Kael'thas Sunstrider will occasionally gain ![]() Cloak of Flames.
Cloak of Flames.
-
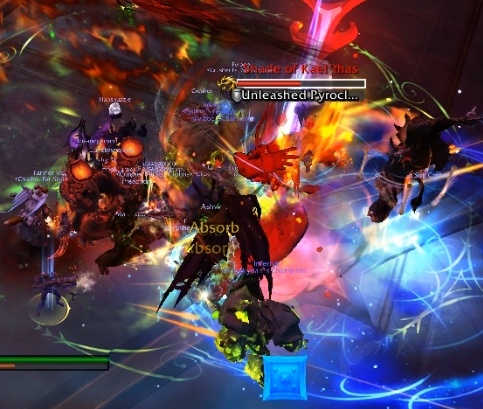
This is a large healing absorption shield. Whilst it holds, the boss will cast
 Unleashed Pyroclasm which is a 6 second cast which deals 2 million damage to the raid upon completion.
 -
The only way to interrupt this cast is to heal through the Cloak of Flames shield.
-
Healers should make sure that they have sufficient cooldowns or stacks of Infuser's Boon to get through this shield.
-
Non-healers can help out by using hybrid healing spells on the boss during this time, or by using the Soul Pedestals to help contribute to this healing requirement.
-
The healing from the Essence Fonts
 Essence Overflow can also be used to heal through this shield, although this would require precise timing and setup.
During phase two, the Shade of Kael'thas will occasionally get ![]() Cloak of Flames
Cloak of Flames
-
This is a damage absorption shield. Similar to the one used by Kael'thas Sunstrider during phase one, players must break through it to prevent an Unleashed Pyroclasm cast from being completed.
-
All players should ensure that they are hitting the shade whilst this shield is active, as breaking through this shield takes priority over dealing with any leftover adds or Reborn Phoenix's.
-
Groups struggling to break the shield in time may want to assign a few strong single target DPS cooldowns for each shield to ensure that it is dealt with.
Reborn Phoenix
Reborn Phoenix adds do not despawn when the Shade of Kael'thas despawns. This means you will have to deal with them for the rest of the fight.
-
The raid will have to ensure that the adds are kited to a low traffic area and are crowd controlled and killed there, as to prevent the spread of Smoldering Remnants.
-
When they reform, the ranged will need to keep killing them in this location as otherwise the room will become increasingly messy.
-
I am not looking forward to this at all...