Uu'nat, Harbinger of the Void
Guida in italiano QUA
Cliccate su Leggi Tutto per la guida testuale in inglese!
Loot
Quick Tips
Relics
-
Tanks - Use the Trident of Deep Ocean relic to place a shield which reduces damage taken by nearby players.
-
Healers - Use the Void Stone relic to make the boss, adds and raid healing immune[li]break your personal shield to remove the healing immunity.
-
DPS - Use the Tempest Caller relic to kill off all adds and players below 25% health. Make sure everyone is healthy before using it!
General
-
Tanks - Keep the boss and adds 10+ yards apart to counter the Undying Guardians
 Shroud of Whispers passive.
 -
Tanks - swap positions when the boss casts
 Touch of the End.
 -
Move out of the
 Oblivion Tears, as standing within one will heal the boss!
Phase One
-
Move through one
 Piercing Gaze of N'Zoth beam -> let your debuff drop -> move through the other beam.
 -
Move to the safe areas when
 Maddening Eyes of N'Zoth is cast.
 -
Stand towards the edge of the ring of void as to place Oblivion Tears away from the centre.
-
Be prepared to move towards the middle of the room each time
 Gift of N'Zoth: Obscurity is cast and the ring of void gets closer.
Phase Two
-
At the beginning of the phase, use the Tempest Caller relic to kill off all phase one adds.
-
After that, use the Void Stone to make the boss healing immune whilst you soak the Oblivion Tears.
-
Move away from the
 Unknowable Terror 80 yard zone.
 -
Interrupt and kill all three Primordial Mindbenders
-
Use the Tempest Caller to kill off several Undying Guardians and Swarming Voidspawns at once.
Phase Three
-
Do not attack your allies when they become "hostile to allies" as
 Gift of N'Zoth: Lunacy is cast.
 -
Stand near players with
 Insatiable Torment to allow them to siphon health from you.
Uu'nat, Harbinger of the Void Abilities & Strategy
Relics of Power
Three relics of power can be found floating at the entrance of the encounter space before the fight begins, however they cannot be picked up until the boss is engaged.
-
Each relic of power will give the player who picked it up an extra action button ability which needs to be used at certain times to counter mechanics.
-
Once the ability has been used, the player will drop the relic on the ground and will be debuffed with
 Feedback: Void,
  Feedback: Ocean or
  Feedback: Storm which prevents them from picking up the relic for a certain period of time.
 -
The relic will also remain on the ground and gather energy over time. Once at full energy it can be picked up once again.
-
Players need to be wary of their position as their relic ability finishes, as you want to make sure you drop your relic in a location where others will be able to reach it easily later on in the encounter.
-
Each relic can only be picked up and used by a character of a certain role and, as this is Crucible of Storms, these powerful relics come with both an upside and a downside.

From Left to Right: Tempest Caller, Trident of Deep Ocean, Void Stone.
Trident of Deep Ocean
The Trident of Deep Ocean is only usable by Tanks:
-
Pro: When used, this will create a large
 Custody of the Deep shield around the tank which redirects 75% of the damage taken by all players within it to the shield.
 -
Con: The shield has a health pool which can be seen on the raid frames. Any health remaining on the shield when it expires will trigger an
 Abyssal Collapse, dealing damage equal to the shields health to each player.
 -
Best time to use: This should only be used when the raid can guarantee that most, if not all, of the shields health will be depleted by the damage mitigated by it.
-
This takes 2 minutes to recharge back to full energy after use. Applies Feedback: Ocean upon use, stopping the player from picking it up again for 3 minutes.
Void Stone
The Void Stone is only usable by Healers:
-
Pro: When used, this will give the user the damage absorption shield
 Embrace of the Void. Whilst the shield holds, the healer generates Embrace of the Void which prevents all enemies from receiving any healing.
 -
Con: Embrace of the Void also reduces all healing received by players by 100% whilst the Embrace of the Void shield holds.
-
Best time to use: This is best used to counter some of the powerful healing effects the bosses spells have. However, this can only be used during periods that the raid can afford to go without healing and players should be topped before its use.
-
This takes 1 minute to recharge back to full energy after use. Applies Feedback: Void upon use, stopping the player from picking it up again for 2 minutes.
Tempest Caller
The Tempest Caller is only usable by DPS:
-
Pro: When used, the user will generate a
 Storm of Annihilation for 15 seconds, dealing damage to all adds and reducing the damage they deal by 50% for 3 seconds each tick. If this deals damage to a target below 25% health, it will instantly kill them via
  Annihilate. Creatures destroyed in this way do not trigger their death effects.
 -
Con: The Storm of Annihilation also hits all players, dealing ticking damage, reducing damage done and triggering Annihilate on players below 25% health.
-
Best time to use: This is only used to remove adds in the encounter space, as this does not interact with the boss. The raid must be healthy whilst the relic is used and healers must be ready to keep all players above 25% health.
-
This takes 30 seconds to recharge back to full energy after use. Applies Feedback: Storm upon use, stopping the player from picking it up again for 4 minutes.
Further details on when each relic is used to counter mechanics will be detailed as the abilities are covered throughout the guide.
Phase One: 100% - 70%
Gift of N'Zoth: Obscurity
The ring of void will shrink throughout the phase!
Uu'nat has an energy bar which passively fills over time. Upon reaching 100 energy, he will cast ![]() Gift of N'Zoth: Obscurity.
Gift of N'Zoth: Obscurity.
-
This deals a moderate burst of shadow damage to the entire raid and create a ring of void around the edges of the encounter space.
-
Standing within the ring of void will deal heavy shadow damage to you every 0.5 seconds until you leave it.
-
Subsequent casts of Gift of N'Zoth: Obscurity will cause the ring of void to encroach further into the encounter space, leaving the raid with less room to move safely within.
-
Players need to be prepared to move away from the ring of void before each Gift of N'Zoth: Obscurity is cast, as to ensure they are not caught in the ring of void as it gets ever closer.
-
The ring of void will not encroach upon the encounter space any further once it has been cast 4 times, however the remaining safe space the raid has at this point is very small.
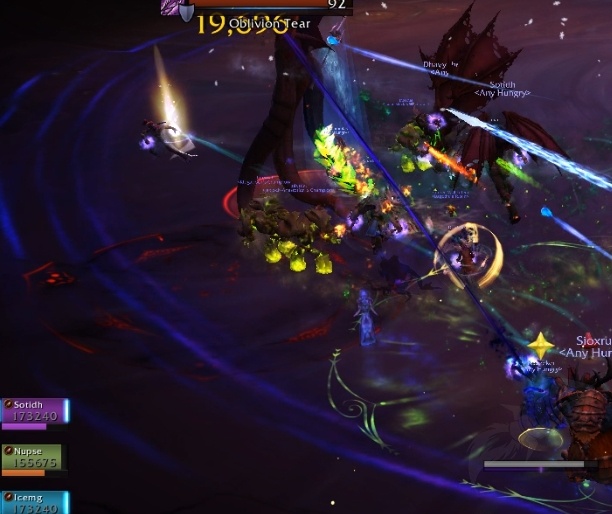
Oblivion Tear
Uu'nat will frequently spawn a shadow circle at the location of a random player. A ![]() Oblivion Tear will spawn at this location moments later.
Oblivion Tear will spawn at this location moments later.
-
The Oblivion Tear will remain at this location permanently, unless a player runs into it. Doing so will deal a small amount of damage to them and heal the boss for 1% of his maximum health.
-
Players must avoid touching these Oblivion Tears at all costs, as healing the boss will prolong the phase substantially, which can lead to the raid running low on space due to the Gift of N'Zoth: Obscurity casts.
-
The raid should always stick close to the edge of the ring of void as to spawn the Oblivion Tears in favourable locations, as you do not want to fill up the middle of the room which will be needed as the ring of void gets ever closer.
-
If the Void Stone is used, the healing that Oblivion Tears provide will be completely negated, as long as the Embrace of the Void holds on the player.
-
We do not recommend that you do this during phase one, as the period just as the group enters phase two is relatively event free and a much safer time to soak the Oblivion Tears.
Maddening Eyes of N'Zoth
The majority of the play space will be marked with a strange translucent membrane looking texture. Several seconds later these areas will be hit with the ![]() Maddening Eyes of N'Zoth.
Maddening Eyes of N'Zoth.
-
Players must find safe areas before this ability is cast, as anyone hit will take a moderate burst of damage and become "hostile to allies" for 8 seconds.
-
Anyone who is accidentally hit should move away from the boss and wait out their debuff, as to ensure they are not accidentally hit by any incidental cleave abilities.

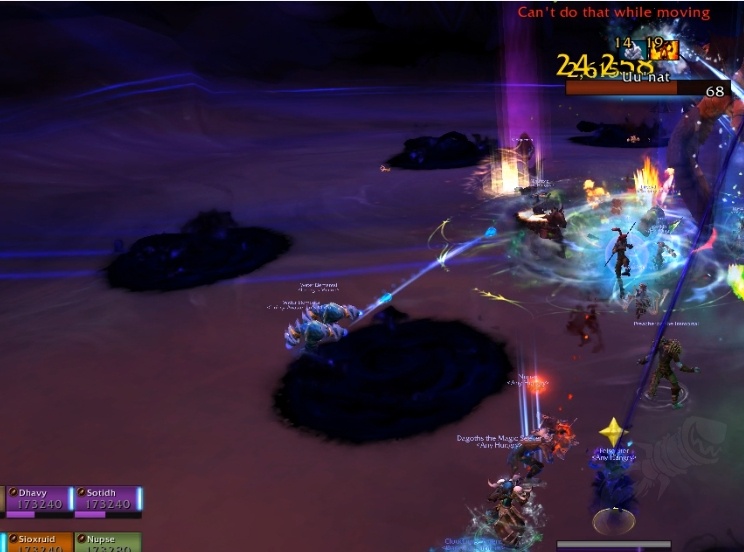
Piercing Gaze of N'Zoth
Two beams will sweep across the platform, dealing small amount of initial damage and applying a nasty 4 second dot to all players who are hit. This dot can stack in both damage and duration.
-
Players need to avoid getting hit by both beams within 4 seconds of each other, instead opting to go through one beam, wait for the debuff to drop, and then go through the other.
-
The beams always sweep across the platform and intersect one another at a right angle, however they do not always enter the encounter space from the same direction.
-
Players should move through the first beam as soon as possible, as this ensures that their debuff will drop before the second beam passes over them.
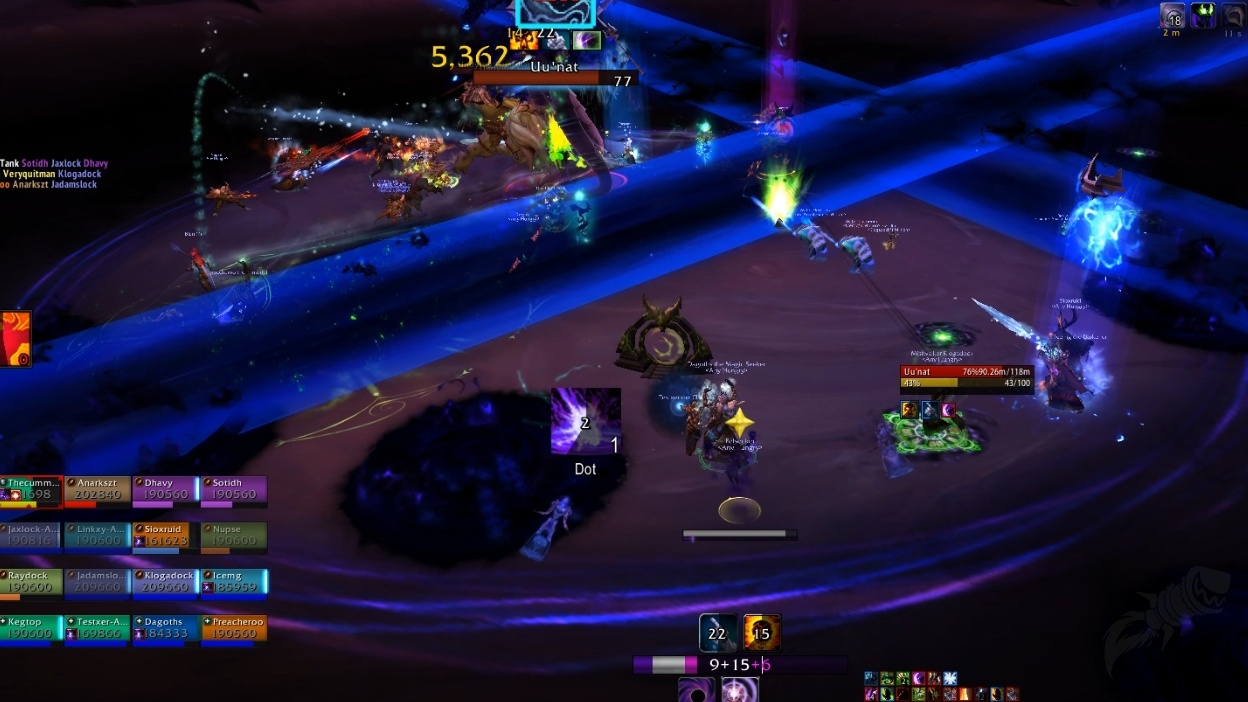
Pass through one beam at a time, leaving enough time for your debuff to drop!
Touch of the End
Uu'nat will cast this frontal cone at the tank, dealing a large amount of shadow damage and applying a 24 second dot to the tank.
-
The tank should face Uu'nat away from all nearby players at all times, as to ensure that only the tank is hit by the Touch of the End.
-
Once the tank has been hit by the Touch of the End, the other tank should taunt.
Undying Guardian
Throughout the phase, Uu'nat will spawn an Undying Guardian. These Guardians will always fixate the tank who is afflicted with the ![]() Touch of the End dot.
Touch of the End dot.
-
These adds should be tanked 15-20 yards away from Uu'nat as they have a
 Sightless Bond aura, which will make both Uu'nat take 99% less damage whilst they are within 10 yards of one another.
 -
When Uu'nat casts Touch of the End, the tanks should either quickly switch positions with one another as to ensure that the Undying Guardians and the boss never get close.
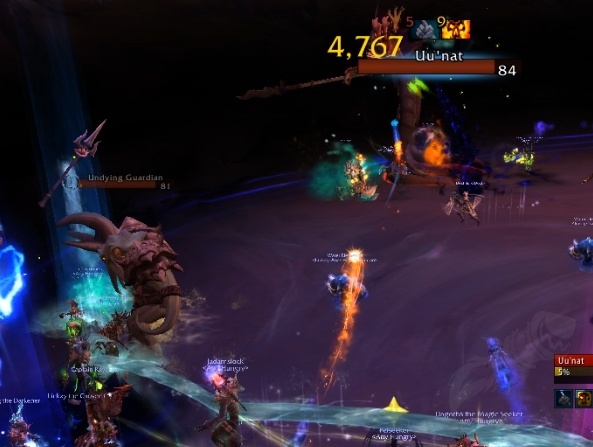
These adds have the ![]() Shroud of Whispers passive, which increases their damage done the higher the health is.
Shroud of Whispers passive, which increases their damage done the higher the health is.
-
Players should long range cleave/multi-dot these adds as to bring down their outgoing damage onto the tank.
-
This passive also prevents the adds from dying, instead they will channel
 Unnatural Regeneration upon reaching 1 hp, which will heal them for an ever increasing amount every second.
 -
The only way to remove the adds permanently from the encounter is to use the Tempest Caller relic, as the Annihilate trigger will immediately kill them if they are below 25% health.
-
We recommend that the Undying Guardians are largely ignored during phase one. Once the transition between phase one and two begins, the raid can then stack them up, bring them below 25% health and use the Storm of Annihilation to finish them off.
-
Once Uu'nat is brought to 70% health, he will enter phase two.
Phase Two: 70% - 45%
Upon reaching 70%, Uu'nat will move towards N'Zoths eye and channel for 20 seconds. During this time the boss takes 99% less damage.
-
The raid should use this time to kill off any of Undying Guardians with the Storm of Annihilation.
-
The raid should also stack up during this time as to allow healers to heal with area of effect spells more efficiently.
-
A single healing cooldown might want to be used at this point as to ensure no player is killed via Annihilate.
-
The encroaching ring of void will now be reset to the size it was when the Gift of N'Zoth: Obscurity was first cast. It will remain at this location for the rest of the encounter.
-
After the Storm of Annihilation has ended, the raid might want to use the Void Stone to clear the encounter space of Oblivion Tears, as there are not many mechanics during the very early stages of the phase two.
-
The group will want to continue to clear patches during times of low incoming raid damage, as long as the Void Stone can be safely used during this time.
Uu'nat will continue to spawn ![]() Oblivion Tears and Undying Guardians, whilst forcing tank swaps with
Oblivion Tears and Undying Guardians, whilst forcing tank swaps with ![]() Touch of the End.
Touch of the End.
-
The Maddening Eyes of N'Zoth, Piercing Gaze of N'Zoth and Gift of N'Zoth: Obscurity are no longer present in phase two.
 Gift of N'Zoth: Hysteria
Uu'nat will cast ![]() Gift of N'Zoth: Hysteria when he reaches 100 energy, dealing a burst of damage to the raid, whilst healing the adds for 50% of their maximum health and giving them a permanent 50% haste and movement speed buff.
Gift of N'Zoth: Hysteria when he reaches 100 energy, dealing a burst of damage to the raid, whilst healing the adds for 50% of their maximum health and giving them a permanent 50% haste and movement speed buff.
-
As this ability is cast infrequently, the raid can still defeat any adds within the time between two of the casts.
-
The raid must keep an eye on when the ability is due to come in and ensure that it doesn't occur whilst adds are being killed, as this would result in a large amount of wasted damage.
-
Due to the permanent haste buff, Undying Guardians need to be defeated before the tanks can no longer handle the incoming damage.
-
This should be done after each set of Primordial Mindbenders have spawned in and have been defeated (approximately every 60-70 seconds).
-
It is risky to use the Void Stone to counter the healing aspect of this spell, as the healers will not be able to top the raid after the hit until the damage absorption shield is broken.
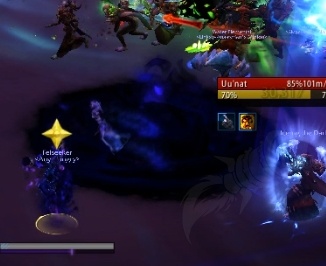
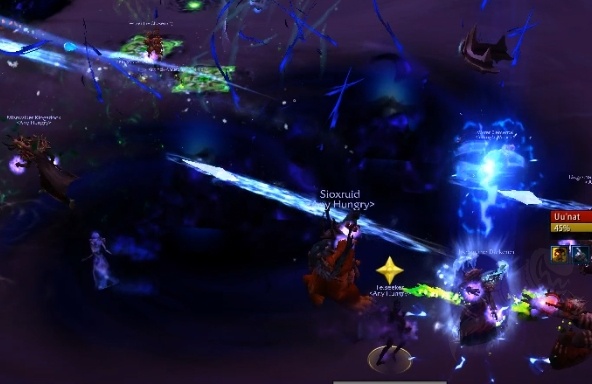
Unknowable Terror
A large section of the encounter space will be marked with a dark blue zone. After 8 seconds, all players within this area will take a burst of shadow damage and be feared for 6 seconds.
-
Players need to quickly identify where this area is and move away from it.
-
Any players caught out by the spell can have their fear dispelled, as it is a magic effect.
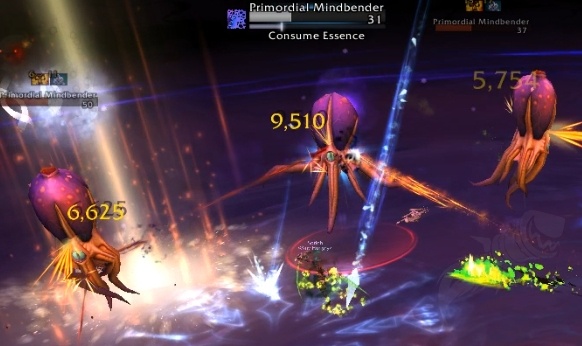
Primordial Mindbender
Uu'nat will summon two Primordial Mindbenders that will spawn randomly across the encounter space.
-
These adds do not need to be tanked, and will simply just cast
 Consume Essence, an 8 second interruptible cast.
 -
If the cast is successful, the add will deal a low burst of shadow damage to the raid and be instantly healed to 100% health.
-
The raid should interrupt these adds to ensure that the cast is never successful.
-
Crowd control spells, including stuns and displacements, can be used to interrupt the effect and help stack up the adds closer.
-
The adds should be focused down by DPS as a high priority.
When a Primordial Mindbender dies, it will spawn multiple Swarming Voidspawns.
-
These adds need to be tanked, but do nothing aside from melee hit.
-
When they die, they will deal a burst of damage to all players within 100 yards via
 Void Eruption.
The Tempest Caller can be used to stop the ![]() Void Eruption from occurring, as adds that die via
Void Eruption from occurring, as adds that die via ![]() Annihilate do not trigger their death effects.
Annihilate do not trigger their death effects.
-
It could also be used to finish off the Primordial Mindbenders themselves, as this would prevent the Swarming Voidspawns from spawning in the first place.
-
The group should use the Tempest Caller during this phase each time a set of Primordial Mindbenders are about to die, as long as the Undying Guardians can also die within the 15 second window.
-
If the Undying Guardians are too high health as the Primordial Mindbenders are dying, then the Tempest Caller should instead be used to kill off the Swarming Voidspawns and Undying Guardians.
Upon reaching 45% health, Uu'nat will transition into phase three by moving to the edge of the encounter space for 20 seconds whilst reducing incoming damage by 99% whilst he RP's.
-
Players should use this time to clear any remaining adds in the encounter space, as to ensure that the whole group can focus all damage purely into the boss.
-
At the beginning of the next phase, the raid may once again want to clear any Oblivion Tear zones as to give more players space to move around safely in throughout the next phase.
Phase Three: 45% - 0%
Uu'nat will continue to spawn ![]() Oblivion Tears and Undying Guardians, whilst forcing tank swaps with
Oblivion Tears and Undying Guardians, whilst forcing tank swaps with ![]() Touch of the End.
Touch of the End.
-
The Undying Guardians should be dealt with in the same way as they have been during phases 1 and 2, with the tanks swapping positions when Touch of the End is cast.
-
The Unknowable Terror and Primordial Mindbender are also no longer present in phase three.
As the ![]() Gift of N'Zoth: Hysteria is no longer present in phase three, the tanks may be able to have more Undying Guardians active without dying.
Gift of N'Zoth: Hysteria is no longer present in phase three, the tanks may be able to have more Undying Guardians active without dying.
-
Groups with strong single target damage can nuke the boss throughout the phase and kill him before too many Undying Guardians spawn and overwhelm the tank.
-
Groups with tanks who cannot handle this incoming damage will want to find windows of low incoming raid damage to kill the Undying Guardians with the Tempest Caller.
-
Regardless of the groups damage potential, the Undying Guardians should be multi-dotted and cleaved throughout the phase as to keep their health low, thus lowering the damage increase from their Shroud of Whispers passive.
Gift of N'Zoth: Lunacy
When Uu'nat reaches 100 energy, he will deal a burst of shadow damage to the entire raid and cause all players to become "hostile to allies" for 5 seconds.
-
The flat damage from the ability isn't likely to cause issues, instead the fact that all players can attack one another and not receive healing from others is the scary part.
-
All players need to be exceptionally careful during this 5 second window, as to ensure they do not splash damage onto anyone accidentally, especially tanks who will still be tanking the adds/boss during this time.
-
Players should look to use personal defensive cooldowns when this ability is cast, and may want to heal themselves if possible.
Insatiable Torment
Throughout the phase on a timer, Uu'nat will mark a player with ![]() Insatiable Torment, causing them to take a small amount of damage every second and reducing the healing they take by 100%.
Insatiable Torment, causing them to take a small amount of damage every second and reducing the healing they take by 100%.
-
The marked player will trigger
 Feed on the Unworthy every 2 seconds, siphoning 10k health from players within 5 yards. This is the only healing the marked player can receive.
 -
A player with Insatiable Torment requires one other player to heal up the damage they take from the ability.
-
If they require extra healing, as they may take damage from other sources during this time, they will need to find other players to siphon health from.
-
This debuff is permanent and acts as a pseudo enrage for the encounter, as more and more players will become healing immune and will have to rely on their non-debuffed teammates for sustenance.
As the ability does relatively low damage, the raid should stack up throughout the phase and just simply outheal the damage dealt by the ![]() Insatiable Torment marked players.
Insatiable Torment marked players.
-
This ensures that all marked players will remain healthy and will not die to other sources of damage.
-
This does require healers to heal and ever increasing amount of raid damage, however it is easily done as long as mana and cooldowns are managed correctly.
In the event that this damage cannot be counteracted by the healers, or if the last phase lasts too long, the raid should remain stacked and marked players should stand alone nearby.
-
The marked players can then move into the raid at any point they require healing.
-
Once they are topped up, they can simply move away from the group and stand alone until they need to siphon health once again.
Bloodlust and DPS Cooldowns should be used in this phase as to ensure that the amount of ![]() Insatiable Torment marks are kept to a minimum.
Insatiable Torment marks are kept to a minimum.
-
Healers should look to rotate large healing cooldowns towards the end of the phase where most Insatiable Torment are present - especially when the Gift of N'Zoth: Lunacy is cast during these later points of the fight.
-
The Trident of Deep Ocean can also be used at these points as to help counter the high incoming damage.
Heroic Difficulty
 Void Crash
Throughout the phase one, Uu'nat will mark two areas of the encounter space with ![]() Void Crash. This ability functions identically to the version seen on the Restless Cabal encounter.
Void Crash. This ability functions identically to the version seen on the Restless Cabal encounter.
-
After a few moments this area will explode, dealing damage to all players within 10 yards.
-
If no players are hit, a new smaller area will be marked and the ability will repeat. This size reduction also reduces the damage the Void Crash deals.
-
The Void Crash will "bounce" like this and reduce in size twice, at which point it will bounce around until the ability eventually hits somebody.
-
Players need to actively avoid getting hit by the Void Crash until it has reached its smallest size, at which point it can be soaked as long as the raid isn't taking other sources of incoming damage.
-
Soaking this ability should be done as often as possible, as this will increase raid damage as casters are able to stand still for longer periods of time.
-
Players must not confuse the Oblivion Tear animation with the Void Crash animation, as accidentally soaking an Oblivion Tear will heal the boss and be a major setback for the raid.
Gift of N'Zoth: Hysteria
![]() Gift of N'Zoth: Hysteria heals adds for 75% health, up from 50% health.
Gift of N'Zoth: Hysteria heals adds for 75% health, up from 50% health.
-
This change acts to punish the raid further for not killing the adds between two Gift of N'Zoth: Hysteria casts, as the additional health they receive will setback the raid substantially if they're in the middle of killing off the adds.
Uu'nat will summon three Primordial Mindbenders in phase two, up from two.
-
This does not change the strategy for these enemies, instead the raid will simply need to interrupt and kill one additional add.
Piercing Gaze of N'Zoth
The two ![]() Piercing Gaze of N'Zoth beams will be activated during phase three.
Piercing Gaze of N'Zoth beams will be activated during phase three.
-
These beams will cause more difficulty during phase three in comparison to phase one, as more players are unable to be healed due to the Insatiable Torment and the Gift of N'Zoth: Lunacy.
-
The raid needs to quickly identify where the beams are coming from and move to ensure they only receive one stack of the Piercing Gaze of N'Zoth at a time.
-
Players marked with Insatiable Torment will want to quickly find a group of players to siphon from once the beams have passed, as to make sure that they can survive the ticking damage of the dot.