Stone Legion Generals
Guida in italiano qua!
Cliccate su Leggi Tutto per la guida completa in inglese!
Stone Legion Generals Quick Tips in Castle Nathria
All Phases
-
Stand in the
 Crystalline Burst radius to remove your bleed debuffs. Everyone else should stack on you afterwards to spread the
  Pulverizing Meteor damage.
 -
 Wicked Blade marked players need to move to the side of the boss and spread 8+ yards apart. All other players should avoid being in the path of the blade.
 -
Nuke down the Stone Legion Goliath add once it begins to cast
 Soultaint Effigy.
 -
When a boss is in
 Hardened Stone Form, kill adds and deliver the
  Anima Orb as they drop to Prince Renathal to give him mana.
 -
At full mana, move close to Prince Renathal to avoid being knocked off when he casts
 Shattering Blast.
 -
Kill both bosses at the same time in the last phase to avoid the
 Soldier's Oath damage increase.
When Fighting Kaal
-
Drop
 Serrated Tear stacks by standing in the Crystalline Burst radius.
 -
Dispel players with
 Heart Rend and spot heal the
  Heart Hemorrhage debuff that is left behind.
When Fighting Grashaal
-
Taunt off of one another to allow
 Stone Fist stacks to drop.
 -
Move away when targeted by the Reverberating Eruption. Other Unstable Ground needs to be soaked at this time!
-
Move away from the patches you spawn when
 Seismic Upheaval is cast.
Stone Legion Generals Phase 1
Upon starting the encounter, General Grashaal will take to the air whilst General Kaal will fight players on the ground. During this time, Grashaal will use a limited toolset and will not be attackable by players.
General Grashaal (Airborne)
 Stone Spike
Whilst airborne, Grashaal will frequently cast ![]() Stone Spike at random players.
Stone Spike at random players.
-
This deals a minor amount of physical damage to them whilst slowing their movement speed by 30% for 8 seconds.
-
This ability is more of an inconvenience than a major issue. Simply out heal the damage and make sure that you are aware that you might occasionally be slowed.
 Stone Breaker's Combo
Grashaal's most important ability is his ![]() Stone Breaker's Combo, which is cast roughly every minute. This ability consists of three steps.
Stone Breaker's Combo, which is cast roughly every minute. This ability consists of three steps.
Step One: One random non-tank player will have ![]() Crystalize channeled into them.
Crystalize channeled into them.
-
This places an 8 yard marker around them whilst dealing moderate nature damage every 1 second over 5 seconds.
-
This marked player should position themselves close to the currently active boss, ready for Step Two.
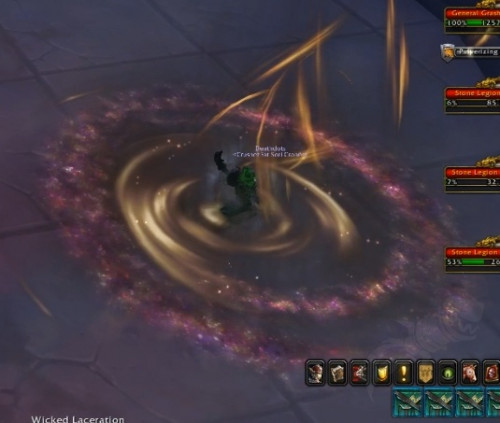
Step Two: The ![]() Crystalize player will trigger a
Crystalize player will trigger a ![]() Crystalline Burst once the 5 second channel completes.
Crystalline Burst once the 5 second channel completes.
-
This applies a 4 second debuff to all players within 8 yards. The debuff deals a burst of nature damage upon application, whilst stunning players for 4 seconds.
-
This debuff also removes all bleed debuffs from the players upon application.
-
Any player that has a bleed debuff, such as Serrated Tear or
 Wicked Laceration, should stand within this Crystalline Burst to remove their bleed. All other players should avoid it.
Step Three: Immediately after the ![]() Crystalline Burst has occurred, the original
Crystalline Burst has occurred, the original ![]() Crystalize target will be marked with a
Crystalize target will be marked with a ![]() Pulverizing Meteor .
Pulverizing Meteor .
-
This lands just as the Crystalline Burst stuns end, dealing lethal nature damage split between all players hit.
-
All other nearby players should now enter this meteor landing location as to ensure that Crystalline Burst afflicted targets do not die to the damage.
To summarize:
-
If initially targeted by
 Crystalize , move near the boss as to allow anyone with a bleed to stand near you.
 -
If you have a bleed, such as Serrated Tear or Wicked Laceration, stand next to the Crystalize target to be hit by the Crystalline Burst to remove the bleed.
-
Once the Crystalline Burst has occurred, all nearby players should stack at this location to split the damage of the Pulverizing Meteor.
General Kaal (Grounded)
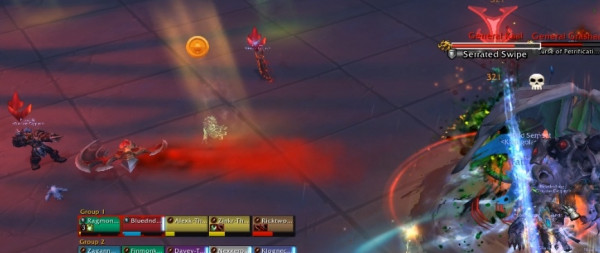
 Serrated Swipe
Every ~20 seconds, Kaal will cast ![]() Serrated Swipe at the tank, which deals a moderate burst of physical damage to them. This damage is not an area of effect spell.
Serrated Swipe at the tank, which deals a moderate burst of physical damage to them. This damage is not an area of effect spell.
-
Serrated Swipe applies a single stack of Serrated Tear, a permanent bleed debuff which deals low physical damage every second whilst increasing the damage you take from Serrated Swipe by 50%. This effect stacks.
-
Tanks should look to reset their Serrated Tear stacks by using the Stone Breaker's Combo. This alone should keep the tanks stack low enough (3-4 stacks at most) to not have to taunt swap off of one another.
-
If a tank misses the opportunity to remove the bleed, or if a tank struggles to handle having 3-4 stacks, the tanks should taunt swap so that no single tanks stacks get too high.
Heart Rend
This boss will occasionally apply ![]() Heart Rend debuffs to the raid, targeting up to 4 random non-tank players.
Heart Rend debuffs to the raid, targeting up to 4 random non-tank players.
-
These debuffs deal low shadow damage every 3 seconds over 36 seconds.
-
When the debuff expires or is dispelled, the player receives Heart Hemorrhage which deals high shadow damage every second over 6 seconds. This cannot be dispelled.
-
When a player is afflicted with Heart Hemorrhage, healers will need to spot heal them to make sure they survive.
When these debuffs are applied, healers should dispel the ![]() Heart Rend players one at a time as to stagger the application rate of
Heart Rend players one at a time as to stagger the application rate of ![]() Heart Hemorrhage.
Heart Hemorrhage.
-
This helps smooth out the healing required over this time, helping ensure that everyone stays alive.
-
Alternatively, confident healers can just dispel all debuffs quickly and just brute force their way through the debuffs. Up to you!
Wicked Blade
Every 30 seconds, Kaal will mark two random non-tank players with ![]() Wicked Blade.
Wicked Blade.
-
Moments later, Kaal will throw a blade towards one of these players. After reaching the player it will then fly to the other marked player and then back to the boss.
-
All players hit by the blade as it travels, including the two marked players, will cause an explosion which deals a burst of shadow damage whilst applying a stack of Wicked Laceration to all players within 8 yards.
-
Wicked Laceration is a permanent low damage bleed debuff which can stack. This can only be removed via bleed removal spells and the Stone Breaker's Combo ability.
Before the fight begins, the raid needs to agree upon a side of the boss which will always be clear for the ![]() Wicked Blade players to move to.
Wicked Blade players to move to.
-
Upon being marked, the two players should move to that side of the boss and spread at least 8 yards apart from one another.
-
All other players, especially melee players, need to move to the direct opposite side of the boss to avoid getting hit by the projectile as it is thrown out or as it comes back.
Stone Legion Goliath
Shortly after the fight begins, and roughly every minute onwards until phase three begins, a Stone Legion Goliath add will appear in the encounter space.
-
This add needs to be tanked by the off-tank and doesn't have any major abilities until it reaches 20% health.
-
At this health threshold, the add will channel Soultaint Effigy, reducing the amount of healing all players receive by 10%.
-
This stacks up every 1 second until it reaches 8 stacks, reducing raid healing received by 80%. The effect only ends when the add is killed.
This add should be tanked near the boss and players should casually cleave it down to 20% health.
-
As soon as it reaches this threshold and begins to cast Soultaint Effigy, all players should kill it as soon as possible.
-
The raid should aim to only ever have 1 of these adds active at any given time, to keep incoming tank damage to a minimum.
Hardened Stone Form
Upon reaching 50% health, Kaal will cast ![]() Hardened Stone Form on herself, reducing all incoming damage by 95%.
Hardened Stone Form on herself, reducing all incoming damage by 95%.
-
Whilst this form holds, the bosses will continue to cast their abilities, albeit at a reduced rate.
-
The only way to remove this damage reduction is by collecting Anima Orb from adds and giving them to Prince Renathal .
Prince Renathal is located towards the entrance of the encounter space and has a mana bar.
-
Players can grant him mana by bringing him Anima Orb that drop from adds that spawn whilst the Hardened Stone Form holds.
-
Upon reaching 100% mana, he will cast Shattering Blast, which removes the form. This also deals a moderate burst of shadow damage to the raid and knocks them away from Prince Renathal .
-
Players must be relatively close to Prince Renathal when he casts Shattering Blast as to avoid being knocked off the platform.
Stone Legion Commando
These adds will flood the skies when the ![]() Hardened Stone Form is cast and will slowly begin to land to the ground, one by one.
Hardened Stone Form is cast and will slowly begin to land to the ground, one by one.
-
Whilst airborne, the adds will mark the location of a random player with
 Cluster Bombardment.
 -
If a player remains in this zone when it explodes, they will take a moderate burst of shadow damage.
-
Whilst dodging these zones, it is best that you still respect the Wicked Blade positioning, as to avoid accidentally cleaving excess damage to other players.
When a Stone Legion Commando add dies, it will drop an ![]() Anima Orb on the ground that lasts 15 seconds.
Anima Orb on the ground that lasts 15 seconds.
-
A player should click on the orb to collect it before running over to Prince Renathal .
-
Once within his red circle, the player will automatically deposit the orb to him, granting him 10% of his mana.
-
Any Stone Legion Goliath that dies during the Hardened Stone Form "phase" will also drop an Anima Orb; however, this orb grants Renethal 40% of his maximum mana.
-
Players should focus all of their damage onto the adds as to get Renethals mana to 100% as soon as possible.
Once the ![]() Shattering Blast is cast and the
Shattering Blast is cast and the ![]() Hardened Stone Form is removed, Phase 2 will begin.
Hardened Stone Form is removed, Phase 2 will begin.
Stone Legion Generals Phase 2
At the start of this phase, Kaal will fly up into the air and out of range of player attacks whilst Grashaal lands and fights the raid directly.
-
Stone Legion Goliath adds will continue to spawn in this phase. The raid should continue to deal with them as usual, by cleaving them down to 20% and then nuking them as soon as possible.
-
Any remaining Stone Legion Commando adds should be killed quickly when this phase begins as to lower the amount of incoming damage the tanks are taking.
General Kaal (Airborne)
General Kaal loses access to her ![]() Heart Rend and
Heart Rend and ![]() Serrated Swipe abilities whilst flying around.
Serrated Swipe abilities whilst flying around.
Wicked Blade
General Kaal will continue to cast ![]() Wicked Blade whilst Airborne.
Wicked Blade whilst Airborne.
-
Marked players will need to position towards the far end of the encounter area, as that is where the blade will be travelling from.
-
All other players must ensure that they are not near this side of the room when Wicked Blade is cast so that they can avoid taking extra damage.
 Ricocheting Shuriken
Kaal will frequently throw ![]() Ricocheting Shuriken at random players, dealing a small burst of physical damage to them.
Ricocheting Shuriken at random players, dealing a small burst of physical damage to them.
-
This blade will then bounce to up to three nearby players, dealing the same damage.
-
As this doesn't apply any nasty bleeds or deal a whole lot of damage, this ability can be largely ignored and passively healed up.
-
In the event that this ability does cause your raid problems, the overall damage it deals can be reduced substantially by being loosely spread apart from one another.
General Grashaal (Grounded)
Grashaal no longer uses ![]() Stone Spike, but maintains his
Stone Spike, but maintains his ![]() Stone Breaker's Combo ability.
Stone Breaker's Combo ability.
-
Players should continue to use this ability in the same manner as before, mainly to remove any bleed debuffs that they have.
Stone Fist
Grashaal occasionally casts ![]() Stone Fist towards the tank, dealing a burst of physical damage whilst knocking back any players within a short range frontal cone.
Stone Fist towards the tank, dealing a burst of physical damage whilst knocking back any players within a short range frontal cone.
-
The tanks should position themselves at to ensure that they are not knocked off the platform to their deaths.
-
This ability increases the damage taken by Stone Fist by 100% for 40 seconds and this stacks up to 5 times.
-
Tanks should taunt off of one another after each Stone Fist cast as to keep incoming damage to a minimum.
-
All other players should position themselves away from the front of Grashaal to avoid being accidentally hit by the ability.
Seismic Upheaval
Every ~30 seconds, this boss casts ![]() Seismic Upheaval which marks the locations of players every few seconds.
Seismic Upheaval which marks the locations of players every few seconds.
-
These locations detonate after 4 seconds, dealing moderate nature damage to all players within 5 yards.
-
Players should move away from the zones that are spawned, ideally whilst being spread apart as this will help make safe spaces between eruption zones.
Reverberating Eruption
Grashaal will cast ![]() Reverberating Eruption on a random non-tank player, marking them for 5 seconds.
Reverberating Eruption on a random non-tank player, marking them for 5 seconds.
-
After 5 seconds, the boss will deal a burst of damage to that player and anyone within 8 yards whilst also marking that location as Unstable Ground.
-
Any older Unstable Ground locations will simultaneously erupt with an Echoing Annihilation, dealing a burst of damage to all players within its radius.
-
If an instance of Echoing Annihilation does not deal damage to a player, it instead deals a burst of damage to the raid via
 Echoing Blast.
 -
Any player hit by Echoing Annihilation or Reverberating Eruption receive the
 Reverberating Vulnerability debuff, increasing damage taken by those abilities by 500% for 6 seconds.
 -
This prevents Reverberating Vulnerability a single player from soaking more than one zone at any given time.
![]() Reverberating Eruption zones should be placed away from the raid but within a reachable distance.
Reverberating Eruption zones should be placed away from the raid but within a reachable distance.
-
The zone should not be stacked with other Unstable Ground locations, as otherwise any soaking player will likely die due to the Reverberating Vulnerability debuff.
-
As soon as the ability is cast, each Unstable Ground location must be entered by a single player to avoid the Echoing Blast raid damage.
Beta Test Note: As this ability was not seen on the earlier versions of this encounter, how best to counter it, as well as specific details such as how long zones linger, is currently unknown. This section will be updated once the boss is seen on live servers.
Hardened Stone Form
Upon reaching 50% health, Grashaal will gain the ![]() Hardened Stone Form debuff, which reduces all incoming damage taken by 95%.
Hardened Stone Form debuff, which reduces all incoming damage taken by 95%.
-
This acts identically to Kaal's version of the ability and players need to deal with it in the same way:
-
Continue to deal with Boss Mechanics.
-
Deliver the Anima Orb to Prince Renathal until he reaches full mana.
-
Don't get knocked off when he casts Shattering Blast.
-
Once ![]() Shattering Blast is cast, Grashaal will lose the
Shattering Blast is cast, Grashaal will lose the ![]() Hardened Stone Form damage reduction and Phase 3 will begin.
Hardened Stone Form damage reduction and Phase 3 will begin.
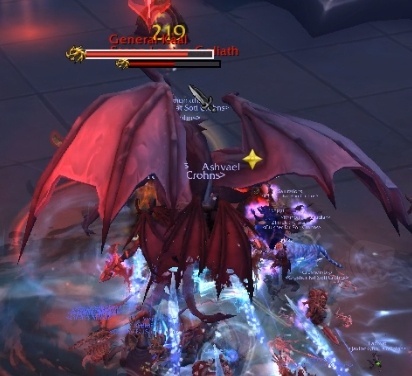
Stone Legion Generals Phase 3
As soon as the phase begins, Kaal will descend down into the encounter space and the raid will be fighting both bosses simultaneously.
-
The bosses must be defeated within a short time frame of one another, as once one dies the other gains a 100% damage increase via Soldier's Oath.
-
The bosses should be kept close together to allow DPS to easily cleave between them.
-
Both bosses have their "grounded" phase abilities and Stone Legion Goliath adds will no longer spawn.
-
Any adds leftover from phase two should be quickly killed as to allow players to focus entirely on the boss abilities.
Beta Test Note: Due to limited testing, in which this encounter received heavy changes, not much is known about this phase. Listed below are a couple of things that you will need to look out for when engaging both bosses at once. This section of the guide will be updated once this boss is seen on live servers.
Stone Fist & Serrated Swipe
As two separate tank debuffs are being applied throughout this phase, the tanks will need to find a suitable time to taunt off of one another.
-
We recommend that tanks do so once the Serrated Tear debuff has been removed via the Stone Breaker's Combo.
-
This will keep overall Serrated Tear debuffs low whilst making sure no tank gets one shot by an empowered Stone Fist hit.
Wicked Blade & Reverberating Eruption
Positioning whilst fighting these two bosses is very important, as you need to make sure that the ![]() Wicked Blade and
Wicked Blade and ![]() Reverberating Eruption mechanics do not occupy the same space.
Reverberating Eruption mechanics do not occupy the same space.
-
This is because you do not want the two mechanics to interfere with one another if they are cast at the same time.
-
We recommend that you continue to place the Reverberating Eruption zones behind the raid and you place the Wicked Blade to the side of the raid.
-
It is important that General Kaal is positioned closer to the Wicked Blade side than Grashaal, as you do not want the Wicked Blade to hit the Grashaal tank.
Heroic Stone Legion Generals in Castle Nathria
Reverberating Vulnerability
The only change listed for this encounter in the dungeon journal for heroic difficulty is that ![]() Reverberating Vulnerability lasts 45 seconds, up from 6.
Reverberating Vulnerability lasts 45 seconds, up from 6.
-
This is strange, as all other difficulties (including mythic) has the duration of the debuff listed as 6 seconds.
-
We believe this is a dungeon journal error and as this boss hasn't been tested on heroic since this ability has been added, there is no way of knowing for sure right now.
-
If this is intended, the raid will need to rotate who soaks each set of Echoing Annihilation as a player taking it twice in a row will die the second time due to the debuff.
Beta Test Note: There are likely to be many other differences between normal and heroic difficulty for this encounter, however this information is currently unknown due to lack of available testing.
Mythic Stone Legion Generals in Castle Nathria
Heart Rend
When ![]() Heart Rend is dispelled, the dispelling player also gains the
Heart Rend is dispelled, the dispelling player also gains the ![]() Heart Hemorrhage debuff.
Heart Hemorrhage debuff.
-
Healers will need to keep both players afflicted with this debuff healthy as the damage it deals is fairly high on mythic difficulty.
-
Additionally, if a Priest was to use
 Mass Dispel on all 4 debuffs, they will gain a longer duration Heart Hemorrhage debuff, as each application of the debuff increases its duration by 6 seconds.
 -
This is to discourage the use of a Mass Dispel strategy, as the priest who does so will be taking very heavy damage for up to 24 seconds.
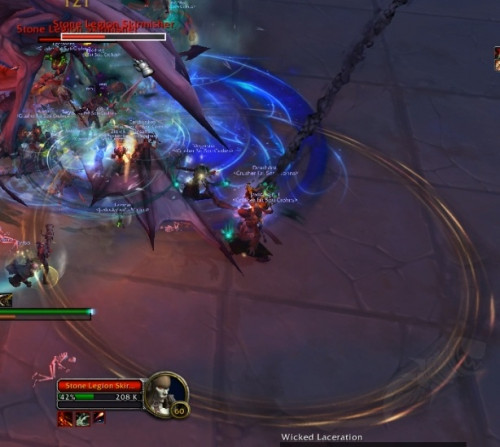
Stone Legion Skirmisher
Stone Legion Skirmisher adds will spawn throughout all three phases, but not whilst a boss is in a ![]() Hardened Stone Form.
Hardened Stone Form.
-
These adds spawn in sets of three and never generate any Anima Orb during any phase.
-
They will frequently cast
 Wicked Slaughter, which teleports the add to a random player, dealing a moderate burst of physical damage and applying a stack of Wicked Laceration.
 -
Players should look to cleanse this Wicked Laceration whenever the next Stone Breaker's Combo is cast.
Upon reaching 30% health, the add will stand completely still and channel ![]() Stonegale Effigy until it is defeated.
Stonegale Effigy until it is defeated.
-
This ability will push players towards the far end of the platform and to their deaths if they do not run against the push.
-
The strength of the pushback isn't strong enough for players not to outrun it, however when multiple
 Stonegale Effigy casts are happening, the strength of the pushback is amplified.
 -
Players need to make sure that adds are killed in a staggered fashion to prevent multiple Stonegale Effigy casts from happening simultaneously.
-
This is most easily done by marking an add to be nuked down. Once that add is defeated, the next add can be worked on and so on until all adds are defeated.
-
These adds should be killed in this way as soon as possible to reduce the amount of Wicked Laceration debuffs applied to the raid.
Volatile Stone Shell
Whenever a Stone Legion Commando add reaches 20% health, they encase themselves in a shield that absorbs all incoming damage and makes them immune to Area of Effect spells.
-
If this shield isn't removed within 6 seconds, a Stone Shell Detonation occurs, killing the add whilst dealing shadow damage to all players within 40 yards.
-
Similarly to how the new Stone Legion Skirmisher adds are dealt with, these adds should be marked and focused down one by one as to make sure that a Stone Shell Detonation never occurs.
Stone Legion Goliath
The ![]() Soultaint Effigy debuff decreases healing taken by 20% per stack instead of 10% and now caps out at 4 stacks.
Soultaint Effigy debuff decreases healing taken by 20% per stack instead of 10% and now caps out at 4 stacks.
-
This means that you'll still be capped at 80% reduced healing taken, but this will occur over 4 seconds instead of 8.
-
This encourages DPS to focus down these adds even quicker so that the raid can receive meaningful healing once again.
Stone Legion Goliath adds have gained two new abilities: ![]() Ravenous Hunger and
Ravenous Hunger and ![]() Ravenous Feast.
Ravenous Feast.
-
 Ravenous Hunger is cast occasionally and permanently increasing the Stone Legion Goliath damage dealt by 25% and this stacks.
 -
This simply forces players to kill these adds within a reasonable time and prevents a cheesy 3 tank strategy where you never kill these adds.
-
Whilst stunned the add hits them with a series of physical damage attacks.
-
Healers should make sure that the target of
 Ravenous Feast is spot healed, as the overall damage taken over the 4 second period is enough to kill most players.
Anima Orb
Whilst holding an ![]() Anima Orb, the player takes moderate shadow damage every 2 seconds.
Anima Orb, the player takes moderate shadow damage every 2 seconds.
-
When the Anima Orb is deposited to Prince Renathal , a
 Volatile Anima Detonation is triggered which deals damage and knocks back all players within 30 yards.
 -
Players should position themselves 30+ yards away from Prince Renathal during the Hardened Stone Form phases as to avoid this knockback.
-
Additionally, players should deposit each Anima Orb one at a time, as to avoid getting hit by a detonation as you attempt to deposit an orb.
-
Once Prince Renathal gains full mana, all players should move towards him as he casts Shattering Blast to make sure that they are not knocked off the edge of the platform to their deaths.