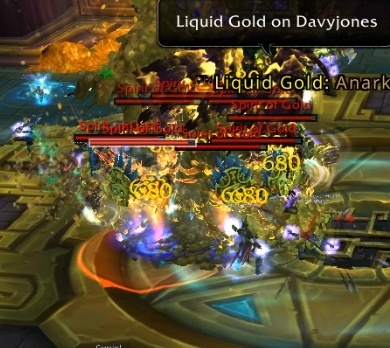
Opulence Treasure Guardian 8.1 PTR
GUIDA IN ITALIANO QUA
Loot
Normal Loot starts at Item level 385, Heroic Loot at 400 and Mythic Loot at 415.
Armor:
-
Cloth:
 Waistcord of Flowing Silk
 -
Leather:
 Amethyst-Studded Bindings
 -
Plate:
 Coinage Stampers
Azerite:
-
Cloth:
 Crown of the Seducer
 -
Leather:
 Crown of A'akul's Dark Reign
 -
Plate:
 Crown of Bloody Succession
Weapon:
-
1H AGI Warglaive:
 Bloodtooth, the Soulfeaster
 -
1H INT Mace:
 Goblet of Glittering Favor
 -
1H AGI Dagger:
 Greed's Folly
Trinket:
-
INT:
 Incandescent Sliver
Quick Tips
Phase One
-
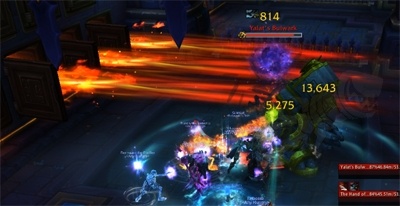
Split the raid into two even groups and defeat the guardians down the east and west paths.
-
Follow the guardian into each next chamber when it loses 10% health, otherwise you'll be set on fire!
-
Healers: use healing cooldowns to counteract the
 Pulse-quickening Toxin and dispel the
  Hex of Lethargy.
 -
Move to the opposite side of the raised arm of the guardian when it casts
 Crush.
 -
Stay behind the Yalat's Bulwark guardian as it channels
 Flames of Punishment.
 -
Let the
 Volatile Charge debuff expire at the sides of the chamber when fighting The Hand of In'zashi.
 -
Make sure everyone picks up a Crown Jewel from the altars on either side of the seventh chamber, with one healer per side picking the
 Amethyst of the Shadow King.
 -
Wait for both guardians to be dead before engaging Opulence.
Phase Two
-
Position the boss in the middle of the encounter space, with the raid stacked up behind him.
-
Let the
 Liquid Gold debuff expire at the edge of the room to correct place the
  Molten Gold pools.
 -
Crowd Control and quickly kill the Spirit of Gold adds before they reach the edge of the room.
-
Healers: ensure that all players are
 Shadow-Touched before and during the
  Wail of Greed cast.
Opulence Abilities & Strategy
Phase One: Raiding the Vault
Although it is possible to engage Opulence from the beginning of the encounter by simply running north into his lair, doing so will cause him to cast ![]() Hoard Power.
Hoard Power.
-
This will cause him to deactivate both guardians, giving him 100% more damage done and maximum health for each guardian deactivated.
-
This buff will render the fight unbeatable, as the incoming damage from the bosses abilities will simply one shot anyone who is targeted.
-
Instead the raid must defeat both guardians before entering the lair of Opulence.
The two guardians are placed in two separate paths, Yalat's Bulwark in the east and The Hand of In'zashi in the west.
-
The adds must remain within their paths, as otherwise the encounter will reset.
-
The raid must split into two groups with an equal amount of roles per group. Only one tank is required per path.
-
When splitting the raid, the two groups should have an equal damage output, as no matter how fast one group kills their guardian, they will always have to wait for the other guardian to die before engaging Opulence.

Split the raid into two even groups and progress down each path!
Each path consists of eight chambers. These chambers are separated by a gate which will be removed once the guardian on that path has dropped by 10% health.
-
When this occurs, the guardian will automatically move into the next chamber before casting
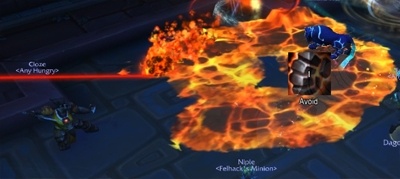
 Consuming Flame, coating the floor of the previous chamber with
  Creeping Blaze.
 -
Players must move with the guardian into the new chamber, as the
 Creeping Blaze will quickly kill any player who stands within it.
 -
The
 Creeping Blaze also prevents players from backtracking or switching sides easily, so once you are on a path: you stick with that path.
Traps
Each of the eight chambers along the path, aside from the first and last, have Traps within them. These traps will always occur in the same chambers, regardless of which path you are on. All traps are triggered automatically and there are four different traps the raid will encounter.
![]() Flame Jet
Flame Jet
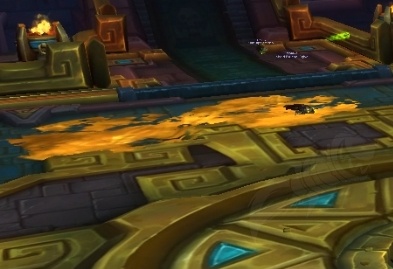
Up to three jets of flame will appear at the side of the chamber before spewing across the room in a straight line, dealing moderate fire damage every 2 seconds to anyone stood within it.
-
The entire group needs to identify where the fire is going to be and quickly stand within the areas of the chamber which are fire free.
-
Ideally the tank will also move the guardian into this free space as to allow melee DPS to damage it without burning alive.
![]() Pulse-quickening Toxin
Pulse-quickening Toxin
This simply deals ever increasing nature damage to the players within the chamber.
-
If players under 50% health take damage from this, they will gain the Quickening Pulse debuff which increases all secondary stats by for 10 seconds.
-
Healers need to be prepared to deal with heavy incoming damage towards the end of any chamber with this trap, using healing cooldowns as they see fit.
-
Healers shouldn't go out of their way to get players to 50% before topping them up again, as this is more likely to lead to an accidental death and the bonus stats isn't required to safely pass through this chamber.
A magic debuff which causes the target to take damage whilst they move. This can be applied to multiple players at once.
-
Healers need to dispel this debuff as soon as they can.
-
Players with the debuff should avoid movement, only moving when they need to position themselves safely for other mechanics.
![]() Ruby Beam
Ruby Beam
A beam will fixate and follow a random non-tank player and chase them, leaving ![]() Scorching Ground patches in its wake.
Scorching Ground patches in its wake.
-
This ability does not apply a debuff to the fixated player. Instead it will always spawn directly on top of the fixated player.
-
The targeted player should attempt to kite the beam towards the edges of the chamber as to give the rest of the group more space to move around in safely.
The order of the traps is always the same and can be seen in the chart below.
| Chamber # | Health Range | Trap(s) Present |
| 1 | 100-90 | None |
| 2 | 90-80 | |
| 3 | 80-70 | |
| 4 | 70-60 | |
| 5 | 60-50 | |
| 6 | 50-40 | |
| 7 | 40-30 | None (Jewel Room) |
| 8 | 30-00 | None (Overload) |
Guardians
The two guardians have two abilities, one that is unique and one that is used by both of them.
![]() Crush is used by both guardians. The guardian will raise one of its arms up and then slam it down after 2 seconds.
Crush is used by both guardians. The guardian will raise one of its arms up and then slam it down after 2 seconds.
-
This deals damage to all players within the chamber whilst dealing additional damage and stunning all players who are on the same side of the guardian the arm slammed down on.
-
As an example, if the guardian raises its right arm and slams it down, all players within a 10 yard semi-circle on the right side of the construct will be stunned.
-
Players need to quickly identify which arm is being raised by the guardian so that they can simply side step to the guardians safe side.
-
Occasionally, the guardian will raise both arms and slam them down. This will act as a frontal hit, so players will need to stand behind the guardian to avoid the stun.
-
The guardian will not rotate to follow the tank once the cast has begun, allowing the tank to also safely side step the ability.
-
Tanks should position the guardians with lots of room to both its left and right side to give players enough room to dodge the incoming
 Crush.
The Hand of In'zashi, which is found on the western path, will frequently apply ![]() Volatile Charge debuffs to players.
Volatile Charge debuffs to players.
-
This 8 second debuff deals moderate ticking nature damage before exploding upon expiration, dealing damage to all players within 6 yards.
-
The debuff will then transform into an orb which is left at the location in which the
 Volatile Charge expired. This orb will pulse damage to nearby players every ~4 seconds.
 -
Players afflicted with
 Volatile Charge must move to the edge of the chamber to allow their debuffs to expire in low traffic areas.
 -
It is occasionally possible to stack
 Volatile Charge orbs on top of one another by allowing the debuff to expire on top of an existing orb when it is between pulses.
 -
Healers should spot heal the debuffed players as to ensure they do not die to ticking damage aspect of the ability.
-
The
 Volatile Charge orbs left behind by the debuff are permanent and will eventually fill a chamber if the guardian isn't damaged quickly enough.
Yalat's Bulwark, which is found on the eastern path, will frequently cast ![]() Flames of Punishment.
Flames of Punishment.
-
This is an 6.5 second channel, during which the guardian will blast out a series of 10 frontal cones whilst spinning clockwise.
-
Players hit by the cone will take a large initial burst of fire damage and receive an 8 second dot.
-
The entire group should stand behind the guardian and move clockwise as it spins, as to avoid all of the frontal cones.
-
It is ideal if a player is closer to the guardian when this ability comes in, as they will have to travel a shorter distance overall when dodging the cones.
This mechanic can be difficult to avoid during chambers with the ![]() Flame Jets, as players may be forced to run into
Flame Jets, as players may be forced to run into ![]() Flame Jets to avoid the
Flame Jets to avoid the ![]() Flames of Punishment.
Flames of Punishment.
-
In this situation, players should always opt to get hit by the
 Flame Jets over the frontal cones, as they deal far less damage.

Stay behind the guardian to avoid the frontal cones!
The Zandalari Crown Jewels
Upon reaching the 7th chamber, the group will have access to 7 jewels. These jewels can be found on altars on either side of the room.
-
The jewels will give the player a powerful permanent buff which will remain active for the rest of the encounter.
-
Each player may only take one jewel, but multiple players can choose the same jewel.
-
Players should interact with the Jewels quickly as to gain their beneficial effects as soon as possible.
-
Players are only able to take jewels that are allocated to their role.
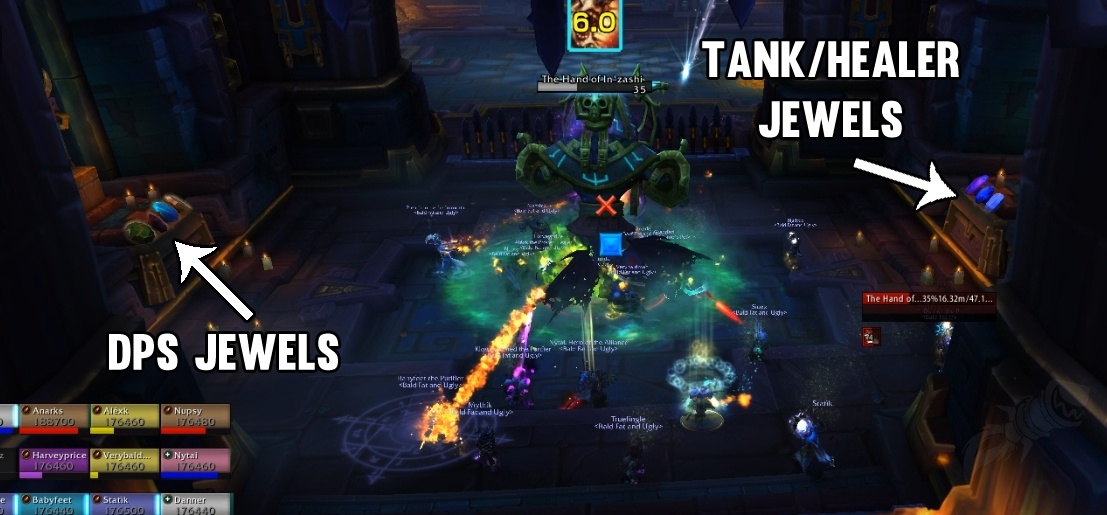
Steal the jewel that is best for your raid!
 Diamond of the Unshakeable Protector
-
This absorbs 50% of all incoming damage up to a maximum of 300% of the player's maximum health. When this absorption is broken the player will be afflicted with
 Depleted Diamond for 30 seconds.
 -
Once the
 Depleted Diamond debuff has expired, the
  Diamond of the Unshakeable Protector buff will reactivate.
 -
This buff is useful when tanking the boss, as the tanks can take turns tanking the boss whilst they have their
 Diamond of the Unshakeable Protector buff up, taunting off each other when the
  Depleted Diamond debuff ends.
We recommend that players are assigned which jewel to pick up before the encounter starts. An example of what this would look like in a 20 man raid would be as follows.
-
 Diamond of the Unshakeable Protector - 2 Tanks
 -
 Amethyst of the Shadow King - 1 Healer per side
 -
 Tailwind Sapphire - Remaining Healers
 -
 Ruby of Focused Animus - 1 Ranged DPS or 1 Ranged DPS per side
 -
 Opal of Unleashed Rage - Execute/Add damaging DPS
 -
 Topaz of Brilliant Sunlight - 2 Ranged DPS
 -
 Emerald of Earthen Roots - All other DPS
Once the jewels have been collected and each group has defeated the last 30% of the guardians health in the final room, the raid should regroup in the middle of the encounter space to fight Opulence.
Phase Two: Toppling the Guardian
Upon engaging Opulence, he will begin to cast ![]() Hoard Power.
Hoard Power.
-
He will not gain any buffs as there is no active guardians. Players can simply use this time to get into position and plough some free damage into the boss.
-
The raid should stack directly behind the boss, who should be tanked in the direct centre of the room, to allow healers to efficiently heal and apply their crown jewel buffs to the raid.
-
The only players who shouldn't be stacked behind the boss is the tanks and any DPS players with the
 Topaz of Brilliant Sunlight.
Opulence has three abilities he will use throughout this final phase.
 Liquid Gold
Several non-tank players will be given the ![]() Liquid Gold debuff.
Liquid Gold debuff.
-
This deals moderate fire damage every 3 seconds for 12 seconds. Upon expiration, the player will create a pool of
 Molten Gold at their location.
 -
 Molten Gold will deal fire damage to any player who stands within it.
 -
Players afflicted with
 Liquid Gold must move to the edges of the encounter space to drop the
  Molten Gold pools away from the raid when the debuff expires.
 -
As the
 Molten Gold is permanent, this acts as a pseudo-enrage, as the raid will eventually run out of space. This makes efficient
  Molten Gold placement a high priority for all raid members.
 Spirits of Gold
On a timer, Opulence will summon eight Spirit of Gold adds. These adds will spawn directly inside him and slowly move towards the edges of the encounter space.
-
Upon reaching the edge they will
 Channel Gold, spawning several
  Gold Burst piles around the room which deal a moderate burst of physical damage to anyone within the 5 yard landing zone.
 -
The adds are susceptible to roots, slows, displacements and stuns, all of which should be used to keep them under the boss whilst the DPS nuke them down.
 Wail of Greed
Opulence will occasionally cast ![]() Wail of Greed. This 10 second channel deals ever increasing shadow damage to the raid every 2 seconds.
Wail of Greed. This 10 second channel deals ever increasing shadow damage to the raid every 2 seconds.
-
Healers with the
 Amethyst of the Shadow King should ensure that all players are
  Shadow-Touched before this ability comes in, as to counteract the heavy damage it deals.
 -
The raid should also attempt to stack up to assist healers in efficiently healing the raid.
-
This ability will deal the most damage to the raid over the course of phase two, making it an excellent time to assign healing cooldowns.
-
When the channel completes, the boss gains a stack of
 Greed, permanently increasing his damage done by 25%. This will stack after each channel, eventually leading to one shots if the boss gets too many stacks.
Heroic Difficulty
Aside from numerical changes, in which the enemies have more health and deal more damage, there are several mechanical changes for the heroic difficulty version of this encounter.
Phase One
 Thief's Bane
When a player interacts with a crown jewel and gains their buff, they will also receive the ![]() Thief's Bane debuff.
Thief's Bane debuff.
-
This 30 second debuff will deal lethal shadow damage to the player when it expires.
-
The healer who picks up the
 Amethyst of the Shadow King must apply
  Shadow-Touched to all players on their path within 30 seconds as to allow them to survive this incoming hit.
 Overload
Upon reaching the final chamber, the guardians will ![]() Overload.
Overload.
-
This causes them to deal low burst of nature damage to random players and empowers their
 Flames of Punishment or
  Volatile Charge abilities.
When ![]() Volatile Charge is empowered, it will increase the size of the orbs left behind. This will increase the range in which they pulse damage as well as increasing the damage itself.
Volatile Charge is empowered, it will increase the size of the orbs left behind. This will increase the range in which they pulse damage as well as increasing the damage itself.
-
Players must ensure that they deposit their
 Volatile Charge orbs efficiently, making the most of the space available as to not run out of room.
When ![]() Flames of Punishment is empowered, it will increase the size of the cone, causing it to hit approximately 270 degrees around the guardian, instead of approximately 70 degrees.
Flames of Punishment is empowered, it will increase the size of the cone, causing it to hit approximately 270 degrees around the guardian, instead of approximately 70 degrees.
-
This makes dodging the cones much more difficult, as the group has a far smaller space in which to remain safe.
-
The safe spot is always directly behind the guardian, so the raid should ensure they are all stacked up there throughout the ability.
-
The guardian will still rotate clockwise throughout the ability.
-
The range of the cone has also been increased, removing the possibility of out-ranging it in this larger room.
The empowered ![]() Flames of Punishment is much more difficult to deal with than the empowered
Flames of Punishment is much more difficult to deal with than the empowered ![]() Volatile Charge.
Volatile Charge.
-
Mobile DPS should be assigned to the eastern path as they will be able to more efficiently damage the guardian as it casts the empowered
 Flames of Punishment.
Phase Two
Opulence has gained two additional abilities in phase two.
 Coin Sweep
He will frequently hit the tank with ![]() Coin Sweep, dealing a huge amount of physical damage to the tank.
Coin Sweep, dealing a huge amount of physical damage to the tank.
-
This damage is enough to deplete the
 Diamond of the Unshakeable Protector buff.
 -
Tanks should taunt off of one another just before each hit as to ensure that the target of the spell always has a full
 Diamond of the Unshakeable Protector buff.
 -
Tanks should also use active mitigation and defensive cooldowns to survive this large hit.
 Coin Shower
Opulence will mark a player with ![]() Coin Shower. After 10 seconds, they will take a lethal burst of physical damage which is split between all players within 7 yards.
Coin Shower. After 10 seconds, they will take a lethal burst of physical damage which is split between all players within 7 yards.
-
The raid should stack up and the
 Coin Shower marked player should stand with them to help split this damage.
 -
Abilities that mitigate or immune physical damage can be used to solo the hit, such as Blessing of Protection, Aspect of the Turtle and Netherwalk.
Mythic Difficulty
 Chaotic Displacement
Whilst fighting the guardians along the two paths, 2 players from each path will swap positions via the ![]() Chaotic Displacement spell.
Chaotic Displacement spell.
-
The afflicted players receive a 6 second debuff before they are teleported which indicates that they are about to swap positions.
-
This ability cannot target tanks.
![]() Chaotic Displacement forces players to position for mechanics "kindly", making sure that they are not going to be out of position when they are swapped with anyone else from the opposite side.
Chaotic Displacement forces players to position for mechanics "kindly", making sure that they are not going to be out of position when they are swapped with anyone else from the opposite side.
-
As an example: mages should not look to blink through the
 Flames of Punishment cast if they are about to be switched with a Death Knight, as the Death Knight will teleport in and be hit by the ability.
 Liquid Gold
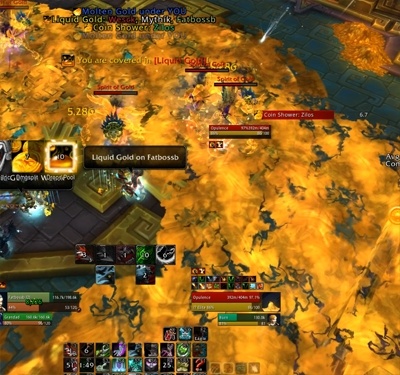
That's a lot of gold...
The ![]() Molten Gold pools left behind by the
Molten Gold pools left behind by the ![]() Liquid Gold debuff during phase two will now buff any Spirit of Gold adds that enter them with
Liquid Gold debuff during phase two will now buff any Spirit of Gold adds that enter them with ![]() Golden Radiance.
Golden Radiance.
-
This will increase their movement speed and heal them for 5% of their maximum health every second whilst they remain inside the pool.
-
This forces the raid to place the
 Molten Gold pools at the very edges of the encounter space, as to ensure the the Spirit of Gold adds never enter them.
 Surging Gold
Opulence will occasionally cast ![]() Surging Gold, which increases the size of the
Surging Gold, which increases the size of the ![]() Molten Gold pools by 100% for 30 seconds.
Molten Gold pools by 100% for 30 seconds.
-
This is usually cast just after a set of Spirit of Gold adds have been summoned.
-
The raid must ensure that the Spirit of Gold adds are crowd controlled and killed before they get anywhere near the pools.

