Guida in italiano Qua!
Cliccate su Leggi Tutto per la guida completa in inglese!
Fatescribe Roh-Kalo Quick Tips
General
-
Move to the safe zone during
 Fated Conjunction.
 -
Move to the edge of the room when targeted by
 Call of Eternity
 -
Stand on top of active runes on the Loom of Fate to move the rings until they lock into place.
-
Avoid being hit by
 Fate Fragments.
Tanks
-
Taunt swap after each cast of
 Invoke Destiny.
 -
When targeted by Invoke Destiny, run away front he raid until the debuff times out.
-
When the Shade of Destiny appears, kite it through the boss, while making sure to stay at least 10 yards away from it.
-
The boss will deal increased damage while he has stacks of
 Diviner's Probe.
Healers
-
Players with Call of Eternity should be spot healed.
-
The whole raid will take a burst of damage each time an Invoke Destiny debuff explodes.
-
The raid will take continuous damage in Phase Two until the loom of fate is realigned.
DPS
-
Kill Shade of Destiny before it reaches the tank.
-
Interrupt Fatespawn Monstrosity when it casts
 Despair.
 -
Use Time Warp in Phase Three to make the hardest part of the encounter easier.
Fatescribe Roh-Kalo Abilities & Strategy
This encounter consists of two alternating phases, with Phase One requiring the raid to battle Fatescribe Roh-Kalo, and deal with a few mechanics he throws at the raid, while the second phase will require the raid to solve a puzzle in a limited amount of time. Finally, in Phase Three, the raid will be fighting the boss while also having to periodically deal with the puzzle.
Fatescribe Roh-Kalo Phase One
In Phase One, Fatescribe will do a series of easy to deal with mechanics, such as marking players with ![]() Call of Eternity, a debuff that explodes when it times out, or casting
Call of Eternity, a debuff that explodes when it times out, or casting ![]() Fated Conjunction, a spell that causes energy to erupt around the encounter area.
Fated Conjunction, a spell that causes energy to erupt around the encounter area.
The raid should be loosely spread around the boss, who should be tanked favoring the center of the room, and moving as ![]() Fated Conjunctions appear.
Fated Conjunctions appear.
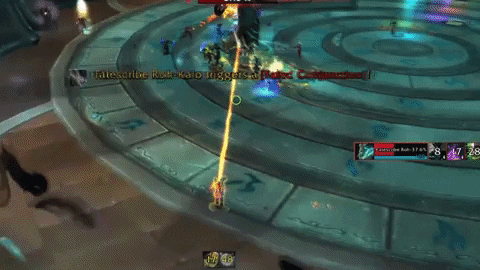
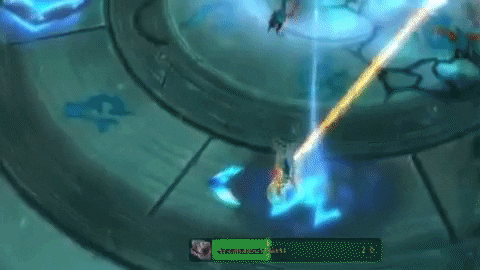
Fated Conjunction
A telegraphed mechanic that will fill part of the encounter area with energy beams which will shoot across the space when the spell is finished casting.
-
Thea easiest way of dodging this mechanic is by standing near one of the edges of the initial indicator, which will always be a safe zone.
-
Keep in mind that the energy beams appear only on a small part of the room, but when they erupt they will mirror their position in the encounter area, making both sides of the circle deadly.
-
Movement speed cooldowns such as Stampeding Roar can be used to reposition the raid quickly.
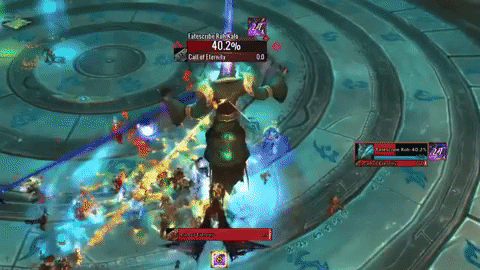
Call of Eternity
Several players will be marked with ![]() Call of Eternity, which is a debuff that lasts 8 seconds, and explodes dealing damage to all players within 20 yards when it times out.
Call of Eternity, which is a debuff that lasts 8 seconds, and explodes dealing damage to all players within 20 yards when it times out.
-
On Normal difficulty, it is enough to move away from other players when targeted.
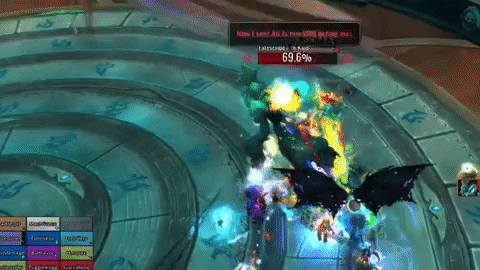
Invoke Destiny
The main target of the boss will be periodically marked with ![]() Invoke Destiny, a debuff that deals fall off damage when it expires, and spawns a Shade of Destiny.
Invoke Destiny, a debuff that deals fall off damage when it expires, and spawns a Shade of Destiny.
-
The tanks should taunt swap when this debuff is applied.
-
The affected tank should run away from the raid to reduce the fall off damage caused.
-
The spawned Shade of Destiny should be kited through the boss to make killing it easier.
-
Stay at least 10 yards away from the Shade of Destiny at all times.
Fatespawn Anomaly
After a Shade of Destiny is killed, it will spawn several Fatespawn Anomalys, which will cast ![]() Anomalous Blast at random targets.
Anomalous Blast at random targets.
-
These small adds can be knocked, and gripped.
-
Group Fatespawn Anomalys up and kill them quickly to avoid taking unnecessary damage.
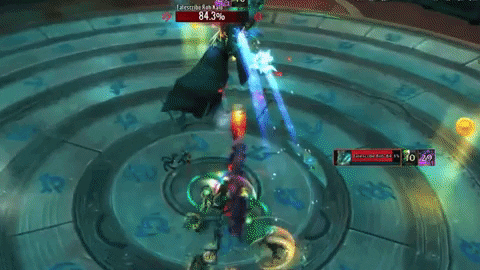
Diviner's Probe
When the boss starts attacking a new target, he will gain stacks of ![]() Diviner's Probe, which will cause the boss to deal extra damage.
Diviner's Probe, which will cause the boss to deal extra damage.
-
Tanks will take extra damage after a taunt swap.
The boss pushing all players away from the Loom of Fate when activating Phase Two.
Fatescribe Roh-Kalo Phase Two: 70%, 40%
When the boss reaches 70%, and 40%, he will push all players off the Loom of Fate, and activate a number of the rings. The number of active rings will depend on raid size. Several players in the raid will gain the ![]() Runic Affinity buff, which will allow these players to stand on top of active runes which will in turn rotate the rings.
Runic Affinity buff, which will allow these players to stand on top of active runes which will in turn rotate the rings.
The goal of this phase is to rotate all the active rings so the active rune lines up with the glowing target, at which point the ring will lock in place and deactivate. While the selected players deactivate all the rings, the rest of the raid should stand on the edge of the encounter area dealing with the adds that spawn.
The Loom of Fates
-
Only players with
 Runic Affinity will be able to stand on the active runes to rotate the ring.
 -
Players must stand on top of the rune to rotate the ring. If the player steps off the rune, the ring will stop spinning.
-
All rings take the same amount of time to complete a full rotation, which means the innermost ring will move very slowly, while the outermost one will move very quickly.
-
The ring can be moved either clockwise or counterclockwise, depending on how many players are standing on the rune.
-
If only one player stands on the rune, then it will spin clockwise. However, if two players stand on it, it will spin counterclockwise.
-
Standing on the wooden dividers between rings will not interfere with the rotation of the rings.
-
All active rings must be deactivated in less than 50 seconds, otherwise all players are killed by
 Darkest Destiny.
 -
A ring can only make about a 75% rotation in the allotted time. We recommend moving all runes clockwise by default, and only moving them counterclockwise if the target is less than a quarter of rotation away.
Fatespawn Monstrosity
-
This add must be killed before it acquires too many stacks of Monstrosity's Boon.
-
Players without the Runic Affinity buff should all be helping in the management of these adds.
-
Interrupt Despair, otherwise all players within 40 yards will take a large amount of shadow damage and be slowed for 6 seconds.
Fatespawn Anomaly
-
Small adds will spawn that cast
 Anomalous Blast at random players.
 -
These adds should be grouped up and killed before they overwhelm the raid.
Fate Fragment
-
Small grey orbs will appear around the encounter area and travel across the platform.
-
Any players hit by a Fate Fragment will take a large amount of shadow damage and be slowed for 7 seconds.
-
Avoid being hit by Fate Fragments, even if it means stepping out of the ring you’re moving.
Fatescribe Roh-Kalo Phase Three: 40%-0%
During this phase, the boss will combine the first and second phase. Periodically, certain rings on the Loom of Fate will become active and must be spun until they deactivate. In this phase, a smaller number of rings will be active, but the players will only have 30 seconds to complete the task.
All mechanics from Phase One will remain active.
Heroic Fatescribe Roh-Kalo
The main change on Heroic is that only players with the ![]() Runic Affinity debuff are able to move the Loom of Fate. This means that each time Phase Two happens, players will have to decide which ring they will go to based on which players have the debuff.
Runic Affinity debuff are able to move the Loom of Fate. This means that each time Phase Two happens, players will have to decide which ring they will go to based on which players have the debuff.
Runic Affinity
About half your raid will gain this debuff when rings on the Loom of Fate activate, allowing the debuffed players to stand on top of the rune to rotate it.
Echo of Eternity
When the ![]() Call of Eternity debuff expires from players, it will leave behind an
Call of Eternity debuff expires from players, it will leave behind an ![]() Echo of Eternity, which will also explode the next time
Echo of Eternity, which will also explode the next time ![]() Call of Eternity debuffs are applied.
Call of Eternity debuffs are applied.
-
Each set of Call of Eternity should be dropped near the wall.
-
After each Call of Eternity, the boss should be moved around the encounter area, so players have space to drop new debuffs.