Loot
Normal Loot starts at Item level 385, Heroic Loot at 400 and Mythic Loot at 415.
Armor:
-
Cloth:
 Manceroy's Flamefists
 -
Leather:
 Cranedancer Leggings
 -
Plate:
 Embersear Waistguard
Azerite:
-
Cloth:
 Blazewing Hood
 -
Leather:
 Mestrah's Singing Spaulders
 -
Mail:
 Mistfire Raiment
 -
Plate:
 Helm of Tempered Jade
Weapon:
-
2H INT Staff:
 Phoenixfire Staff
Trinket:
-
AGI:
 Invocation of Yu'lon
Quick Tips
Quick Tips
-
Keep the Monks health percentage lower than the Mage at all times.
-
Engage the Monk in melee combat to interrupt the Whirling Jade Storm.
-
DPS through the Mages Fire Shield and then interrupt the Pyroblast.
-
Tanks: Taunt the Mage off of one another to keep the Rising Flames stacks below 4.
-
Tanks: Face the Monk Images in the order they appear during Multi-sided Strike.
-
Healers: Dispel the Searing Ember debuffs, prioritizing those with the shortest duration.
Fire of the Mist - 30 Energy
-
The entire raid should stand within a single Living Bombs Chi-ji's Song cloud as to maintain line of sight of one another.
-
Defeat the Living Bombs one by one whilst avoiding their rotating Beam attack.
-
Healers: Be prepared to use cooldowns to counteract the damage from multiple Explosions.
A Flash of Hostility - 60 Energy
-
Travel through the maze made from Ring of Hostility zones, whilst dodging the Pheonix Strike patches.
-
Destroy a section of the barrier before interrupting the bosses.
The Serpent and the Phoenix - 100 Energy
-
Side step out of the Dragon's Breath cone.
-
Healers: Be prepared to use healing cooldowns to counter the ticking damage from the Blazing Pheonix passive.
Jadefire Masters Abilities & Strategy
The two bosses in this encounter do not share a health pool, however the raid is encouraged to keep their health percentages similar due to the Monk's ![]() Harmonious Spirits passive.
Harmonious Spirits passive.
-
This passive will buff the damage output of the Monk whenever they are at a higher health percentage than the Mage. This bonus is stronger the larger the gap between the two bosses.
-
To counter this, DPS should primarily focus on damaging the Monk whenever possible, whilst cleaving/multi-dotting the Mage.
-
There are periods of time during the encounter where the Monk is not directly attackable. During these times the DPS can focus on the Mage, assuming that doing so will not create a large health gap between the two.
-
At no point should the raid look to have the Mage anymore than 10% lower than the Monk.
This passive only works one way. In theory, the raid can have the Monk at a far lower health percentage than the Mage and suffer no negative consequences.
-
The encounter is over once both bosses are defeated, which encourages DPS to deal as much damage to both bosses simultaneously as they can.
Monk Abilities
The Monk has a couple of mechanics that primarily require the attention of the tank.
 Multi-Sided Strike
The Monk will cast ![]() Multi-Sided Strike on the tank every ~30 seconds. This ability will teleport the tank high into the air and place them on a green platform.
Multi-Sided Strike on the tank every ~30 seconds. This ability will teleport the tank high into the air and place them on a green platform.
-
Three Monk images will then appear, one after another. They will then each charge into the tank in the order that they spawned in.
-
Additionally, the image that is about to charge in will pulse out light briefly beforehand, giving the tank a brief moment to easily identify which way they need to face.
If the tank faces the image that is flying towards them, they will not take any damage and will gain a debuff which increases their damage and healing done for 20 seconds. This buff can stack.
-
Failing to face the image that flies towards them will cause the tank to take a high burst of physical damage.
-
The tank should aim to face each of the three images in order to reduce the amount of damage they take from the ability.
-
Once all three images have flown towards the tank, the tank will be teleported back to the encounter space and given the
 Tested debuff, increasing the physical damage they take by 100% for 40 seconds.
 -
After dealing with the Multi-Sided Strike, the tanks should taunt off of one another to ensure that the Monk is not hitting the tank with the Tested debuff.
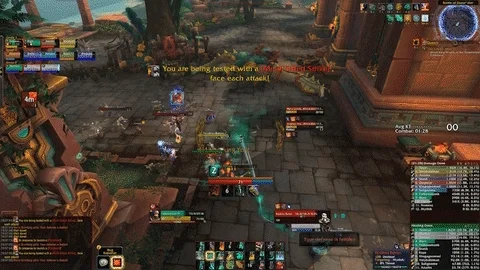
Face the images in the order they appear!
 Whirling Jade Storm

The Monk will frequently charge to a random nearby area of the encounter space and begin to channel ![]() Whirling Jade Storm.
Whirling Jade Storm.
-
This channel will continuously deal low nature damage to the raid every 1 second until the Monk is engaged in melee combat, at which point the effect ends.
-
The tank responsible for the Monk during this time needs to quickly rush over and melee hit them to interrupt the ability.
-
A high mobility melee DPS (such as a Demon Hunter or Monk) or nearby melee weapon-wielding ranged DPS can quickly rush over and stop the effect, instead of the tank.
Mage Abilities
The Mage has mechanics that require the attention of the entire raid.
 Fireball
Instead of melee attacking, the Mage frequently casts ![]() Fireball at the current tank.
Fireball at the current tank.
-
This deals a moderate burst of fire damage and applies a stack of the
 Rising Flames debuff.
 -
Rising Flames deals ticking damage over 6 seconds. When the debuff times out, a
 Burnout
  Explosion is triggered.
 -
Burnout deals a burst of fire damage to the entire raid. This damage is stronger the more stacks of Rising Flames dropped from the tank.
Tanks should actively seek to keep the ![]() Rising Flames stacks low, as to ensure that the
Rising Flames stacks low, as to ensure that the ![]() Burnout
Burnout ![]() Explosion damage is reasonable.
Explosion damage is reasonable.
-
We recommend that the tanks taunt the Mage off of one another when they reach 4 stacks.
-
Do note that the Rising Flames debuff can drop without taunting, as the Mage will delay casting Fireball if they are casting other spells at the time (such as
 Pyroblast).
Pyroblast
The Mage will occasionally teleport the the location of a random player and apply a ![]() Fire Shield to themselves.
Fire Shield to themselves.
-
 Fire Shield is a damage absorption shield which prevents the Mage from being interrupted.
As soon as the ![]() Fire Shield has appeared, the Mage will begin to cast
Fire Shield has appeared, the Mage will begin to cast ![]() Pyroblast at a randomly selected player.
Pyroblast at a randomly selected player.
-
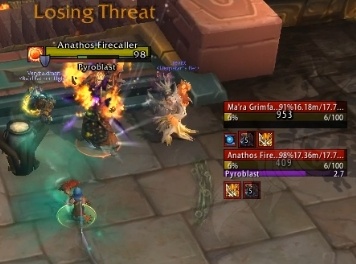
Pyroblast is an 8 second interruptible cast which deals a near lethal amount of damage and applies a hard hitting dot debuff.
-
Players must first damage through the Fire Shield before interrupting the Pyroblast before the spell ends.
-
All DPS should make sure they switch to the Mage when this happens as to ensure that the Fire Shield is broken in time.
 Searing Embers
The Mage will apply several ![]() Searing Embers magic debuffs across the raid, each with a different duration (a maximum of 10 seconds and minimum of 4 seconds).[/li]
Searing Embers magic debuffs across the raid, each with a different duration (a maximum of 10 seconds and minimum of 4 seconds).[/li]
-
These deals moderate ticking damage over their duration before triggering an
 Unleashed Ember upon expiration, dealing a substantial burst of magic damage to the raid.
 -
The Unleashed Ember Explosion will not trigger if the debuff is dispelled.
Healers need to dispel all of the Searing Ember debuffs as soon as possible, prioritising those with a shorter duration.
-
Healers in an organised group may wish to assign dispels based off of duration/raid frame position as to reduce the chance of several healers wasting GCD's on dispelling the same debuff.
-
The amount of Searing Embers debuffs applied to the raid scales with raid size. Groups with 1 healer per 5 players should have enough dispels to cover each Searing Embers debuff.
-
This debuff can be mass dispelled by a priest, however the ability comes in too frequently to be covered by a single priest alone.
Team Attacks
Both bosses will gain energy passively over the course of the encounter. The bosses will cast a combined Team Attack at certain energy thresholds.
Fire from Mist
At 30 energy, the bosses will summon three Living Bomb adds. These adds are stationary and do not need to be tanked.
-
They will slowly rotate on the spot whilst channeling a short range
 Beam which deals heavy fire damage to those who are hit by it.
 -
The Living Bombs will also spam cast Explosion, a 10 second cast which deals a moderate burst of fire damage to all players.
Each Living Bomb is surrounded by a ![]() Chi-Ji's Song smoke cloud. This deals low ticking nature damage to those who stand within it.
Chi-Ji's Song smoke cloud. This deals low ticking nature damage to those who stand within it.
-
The clouds also act as line of sight. Players outside the cloud cannot cast spells/attack enemies inside of the cloud and vice versa.
The entire raid should stack within a single Living Bomb smoke cloud and defeat that Living Bomb, before moving onto the next as a single unit.
-
It is important that everyone remains within the same line of sight, as to allow healers to continue to dispel the Searing Ember debuffs.
-
Remaining stacked within a cloud also allows the raid to switch to the Mage if a Pyroblast is cast during this time, as the Mage always teleports to a random players location.
-
Throughout the time in which the Living Bombs are active, the raid must continue to deal with the other abilities the bosses usually cast as the highest priority.
-
Healers may wish to assign a healing cooldown or two for the first few Explosion casts, as multiple adds will be casting this at once and the raid will be taking substantial damage.
During PTR testing, the three Living Bomb adds would occasionally have a different health pools from one another.
-
The difference was not always present or consistent, but the health difference could be as large as the highest add having 2 mil health and lowest having 300k.
-
If the Living Bomb adds have varying health pools on live servers, the add with the lowest health should be focused down first, as to eliminate one Explosion damage source as soon as possible.
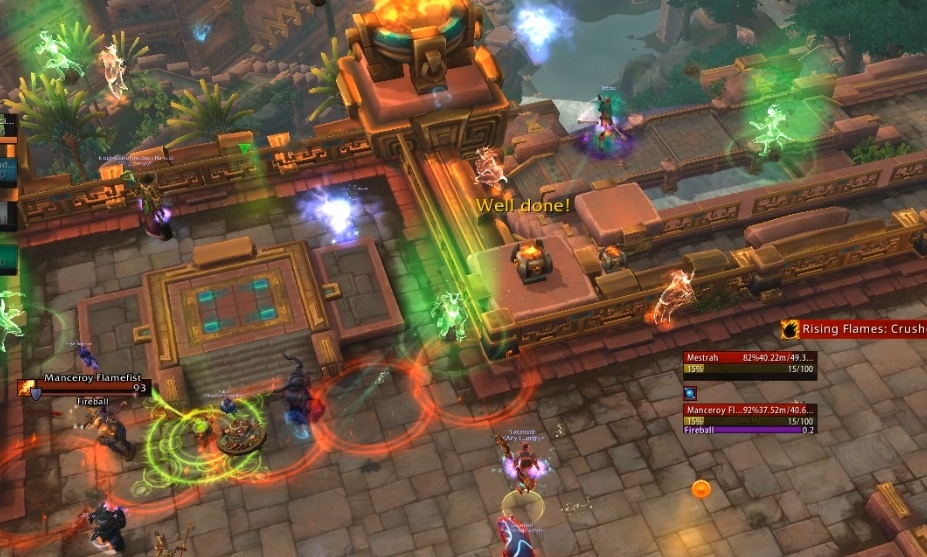
A Flash of Hostility
-
At 60 energy, all players will be teleported to one side of the encounter space, whilst the bosses teleport to the far side.
-
The location both the raid teleports to and the bosses teleport to are set and do not change from pull to pull.
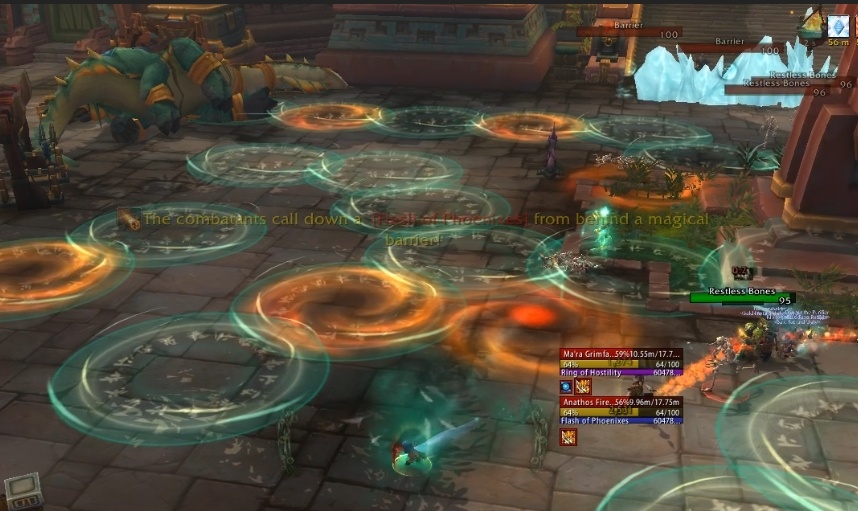
Traverse the maze to reach and destroy the Barrier!
The Monk will then spawn a maze consisting of Rings of Hostility. These act identically to the monk spell Ring of Peace.
-
Players will be knocked back upon contacting a
 Ring of Hostility, however leaps/teleports and warlock gateways can be used to fly over/through them.
 -
The maze layout seems to be in a set pattern which doesn't change from pull to pull.
-
As the Horde and Alliance fight the bosses in different encounter spaces, they will have different maze patterns to get through.
The Mage will continuously mark areas with ![]() Phoenix Strike.
Phoenix Strike.
-
These areas explode after a few moments, dealing high fire damage to all players within the area.
A large barrier forms between the bosses and the raid. The barrier is made of four attackable sections.
-
Destroying a section will allow you to access the bosses and interrupt their abilities, ending the Team Attack and resuming the encounter again.
The raid needs to move through the maze and get to the barrier as soon as possible, all whilst dodging the ![]() Phoenix Strike areas.
Phoenix Strike areas.
-
Warlock gateways should be used to skip large sections of the mazes. Players with other ways of skipping parts of the maze should do so, as they can begin damaging the barrier earlier.
-
Warlock gateways are especially strong in the Alliance version of the maze, as the actual distance between the raid and the bosses is shorter, allowing the gateway to counter a larger portion of it.
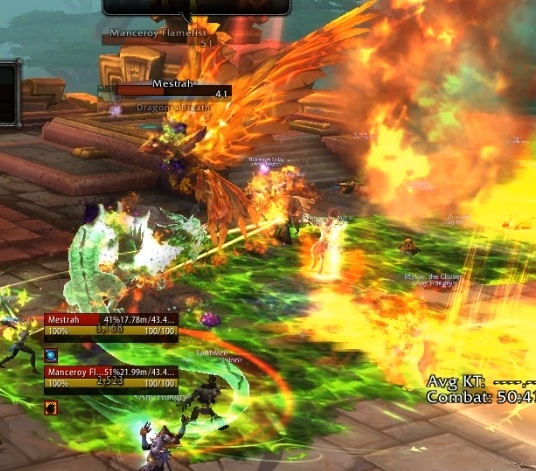
The Serpent and the Phoenix
Upon reaching 100 energy, both bosses will transform into an empowered form.
The Monk will morph into a Jade Serpent.
-
During this time the Monk can not use their Whirling Jade Storm ability, but have gained the Dragon's Breath ability.
-
Dragon's Breath will deal a large burst of Fire damage in a cone faced towards a random player.
-
The raid must be ready to side step out of this cone. This is more easily done by having the raid spread out around the Monk.
The Mage will transform into a Phoenix.
-
During this time, the Mage can no longer cast Pyroblast. Instead the Mage has gained the Blazing Pheonix passive.
-
This passive deals moderate fire damage to all players every 3 seconds. This lasts until the Mage has been defeated.
-
Healers must be prepared to deal with the prolonged raid damage throughout this last section of the encounter, ideally by having mana and a few cooldowns.
On normal mode, there is no crazy rush to leave this phase, as the incoming ticking damage is pretty low.
-
However, if your raid is struggling to survive during this phase, Bloodlust and DPS cooldowns should be used to try and make it as short as possible.
Heroic Difficulty
Both the Monk and the Mage have gained an additional ability that they will frequently cast throughout the encounter.
 Spirits of Xuen
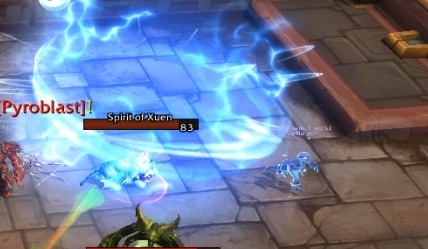
Kite the Spirit of Xuen add while the raid kills it!
The Monk will occasionally spawn a Spirit of Xuen add. This add will fixate on a random non-tank player until the player dies or the add dies.
-
Upon reaching the player, the Spirit of Xuen will hit them with
 Tiger Paw, dealing a substantial burst of nature damage to them.
 -
Due to this high damage, the fixated player should avoid being within melee range of the add as much as possible.
-
Whilst chasing the player, the add will frequently
 Pounce at their current location, dealing a moderate burst of nature damage to anyone within 5 yards.
 -
The player kiting the Spirit of Xuen add should ensure that they are always at least 5 yards away from others to reduce incoming raid damage.
All DPS should switch to the Spirit of Xuen add as soon as it spawns and focus it down, using slows and stuns to help the fixated player kite more easily.
-
Groups with confident healers may want to have the fixated player "tank" the add next to one of the bosses, as to allow DPS to cleave damage on to the boss whilst focusing the add.
The Spirit of Xuen can be summoned during the Fire from Mist Team Attack. The raid should priorities killing the Spirit of Xuen add over dealing with the Living Bombs.
Multisided Strike
The Monks Multisided Strike will now summon four visions, up from three.
-
Additionally, the Multisided Strike will be cast on multiple members of the raid during the The Serpent and the Phoenix Team Attack.
-
The entire raid must be prepared to face the visions, as doing so successfully will help with the increased output requirements during this late stage of the encounter.
-
Only one tank will be selected for this ability. This ability can target healers, although it will always leave one behind to heal the untargeted players.
 Magma Trap

The Mage will frequently spawn several ![]() Magma Traps. These are red zones which will remain on the ground until a player runs into them.
Magma Traps. These are red zones which will remain on the ground until a player runs into them.
-
The trap will trigger when ran into, dealing a large burst of fire damage and sending all players within 6 yards high into the air.
-
The fall back down to the ground is high enough to instantly kill any player who doesn't have an effect to cancel or mitigate fall damage.
-
Anyone who survives the Magma Trap will receive a permanent debuff, increasing the damage they take from subsequent Magma Trap Explosions by 100%.
![]() Magma Traps will frequently spawn in high traffic areas, causing considerable difficulties for players who need to move around.
Magma Traps will frequently spawn in high traffic areas, causing considerable difficulties for players who need to move around.
-
This is most problematic when the Monk will dash into a Magma Trap and begin to channel Whirling Jade Storm, as the tank will not be able to engage the Monk in melee combat to stop the effect.
-
The raid must work to clear the Magma Traps that spawn in bad locations.
Clearing ![]() Magma Traps can be done in multiple ways:
Magma Traps can be done in multiple ways:
-
Rogues with Cloak of Shadows and Hunters with Aspect of the Turtle can trigger traps without being thrown into the air or receiving the damage taken increase debuff.
-
Combining one of these immunities with a movement speed increase such as Sprint or Aspect of the Cheetah can allow the player to clear several traps at once.
-
Raid groups with several Hunters and Rogues should continuously clear the Magma Traps on a rotation to keep the encounter space clear.
-
This does not work with the Paladins Divine Shield, although this could be a bug which may be fixed by the time the encounter hits live servers.
-
-
Classes with fall damage mitigating/cancelling effects can soak a poorly placed Magma Trap by running into it and then countering the knock up.
-
This can only be done once per player, as they will still gain the damage taken increase debuff - causing them to be one shot the second time they take a Magma Trap without a large defensive cooldown.
-
Multiple classes have abilities which can counter the fall damage from the Magma Traps, such as Hunters with Disengage, Mages with Blink, Monks with Transcendance, any class with a well timed priest Leap of Faith/Levitate etc.
-
-
A player can soak a Magma Trap just before the Flash of Hostility Team Attack teleport.
-
If timed correctly, the player could be teleported safely to one side of the encounter space before they fall from the sky.
-
This would require precise timing, but would be really cool if you pulled it off.
-
Flash of Hostility
The Flash of Hostility Team Attack has been adjusted slightly on heroic difficulty.
-
The barrier separating the bosses from the raid will only have one section be vulnerable to damage, rather than all four.
-
This isn't an issue, as the raid can instead just kill this single vulnerable section to gain access to the bosses.
If the raid wishes to make more sections of the barrier vulnerable to damage, players can collect ![]() Force Orbs that are scattered throughout the
Force Orbs that are scattered throughout the ![]() Ring of Hostility maze.
Ring of Hostility maze.
-
Running into a
 Force Orb will grant the player the use of an extra action button which can be used on an invulnerable section of wall.
 -
Doing so will simply allow players to deal full damage to this section of wall.
This is not a compulsory task. Instead we believe the mechanic is present on heroic difficulty to introduce players to it, before it becomes mandatory on mythic.
Serpent and the Phoenix
During the Serpent and the Phoenix Team Attack, the Monks ![]() Dragon's Breath will leave behind a large line of fire in the direction they were facing.
Dragon's Breath will leave behind a large line of fire in the direction they were facing.
-
Players should move swiftly from this fire as it deals substantial fire damage every second whilst you are stood within it.
-
Although the raid shouldn't run out of space during this last short phase, the should attempt to "bait" the fire into good locations by standing in positions in which the fire will not disrupt any movements the raid needs to do.
Mythic Difficulty
Aside from numerical changes, in which the bosses deal more damage and have more health, there are a few mechanical changes for this encounter on Mythic difficulty.
Multisided Strike
The Monks Multisided Strike ability will target 15 members of the raid each time it is cast, and 5 visions will charge the players, up from 4.
-
The visions deal extremely high damage on mythic, easily killing players who fail to face 2 out of the 5 visions.
-
Players simply need to identify which visions are targeting them and face each one in turn.
-
As players can see other players Multisided Strike visions, it can be difficult to distinguish which visions are attacking you and which are attacking other players.
It can be hard to tell which visions are yours...
Spirits of Xuen
The Monk will summon two Spirit of Xuen adds, up from one.
-
These will each fixate a different player and will cast the same abilities as heroic difficulty.
-
DPS should either focus down both adds simultaneously, or one by one.
A Flash of Hostility
During the Flash of Hostility Team Attack, none of the barrier sections will be attackable until players have used a ![]() Force Orb on all four sections.
Force Orb on all four sections.
-
Once this is done, the barrier can then be destroyed and the bosses can be accessed.
-
The raid needs to ensure that they gather at least 4 Force Orbs on their way to the barrier.
Whilst moving throughout the ![]() Ring of Hostility maze, a Spirit of Niuzao add will chase players through the maze. The Spirit of Niuzao add can not be attacked or interacted with in any way.
Ring of Hostility maze, a Spirit of Niuzao add will chase players through the maze. The Spirit of Niuzao add can not be attacked or interacted with in any way.
-
As it travels, it will leave behind images that continuously pulsate damage to nearby players via the
 Path of Niuzao effect.
 -
These images do not despawn and effectively prevent players from backtracking through areas, which can be problematic when the raid misses any Force Orbs on their way to the barrier.